BeChewy believes that a pet-friendly home can be as stylish as any other (albeit, with a bit more pet hair—but that’s what lint rollers are for!). That’s why we’re bringing you Fixer Pupper, a design-forward home improvement series curated especially for pet parents. From choosing a new exterior door (and a pet door to go with) to sprucing up your space with pet-safe paint, here’s how to create a cozy home for you and your fur family.
Painting a room a fresh, new color is one of those small home improvement projects that can make a huge impact to your space. But there’s more to consider than just paint samples if you’re a pet parent—like which paint formulas are the most pet-friendly and how to keep your fur baby safe from those nauseating fumes.
But don’t worry: We’re here to help you tackle this DIY home project. With advice from interior design and home improvement experts and veterinarians, you’ll soon be on your way to painting your home like a pro and knowing everything you need to keep your pets safe while doing it.
What Paint Is Right for You and Your Fur Fam?
With the countless paint colors and variety of finishes out there, it wouldn’t take long for anyone to feel overwhelmed by the number of choices. So, we broke up how to choose a paint in just few easy steps.
Unless you already have a specific color in mind, trying to narrow down your options can be dizzying. After all, the color is everything, so it’s worth taking the time to find the right one for you.
Ashley Levy, a New York City interior designer and home stylist, suggests turning to Instagram for some color inspo. Paint companies, like Benjamin Moore and Sherwin-Williams, are a great place to start, she says. Keep tabs of the photos you gravitate to and you might just find that you love the rich, maximalist feel of jewel tones, or boho-inspired earthy greens. Or, if you’re going for a hygge vibe, see the serene shades of this ready-made paint palette.
There are two primary kinds of interior paints, oil- and water-based, says Ian Charters, owner of Handyman Connection in Keller, Texas. Here’s what you need to know about each:
- Oil-based paints: These are considered more durable, so they’re often preferred for interior trim, doors and paneling. Oil-based paints go on smoothly, cover better and can help hide small imperfections. However, they have higher VOCs—volatile organic compounds—which is what gives paint those strong fumes that can be dangerous (for humans and pets) if you’re not in a well-ventilated area.
- Water-based paints: These win the convenience award, for sure. They dry faster, are easier to clean up after painting and have far fewer VOCs. In turn, they may not hold up as well to years of scratching paws, nicks and dings.
Once you’ve selected a base, it’s time to decide on a finish. Here, Charters runs us through the options:
- Flat/Matte: Since it has no sheen, flat or matte finishes are best for rooms where light reflection might be annoying, such as in bedrooms and media rooms. They are, however, more difficult to clean and are more likely to grow mold or mildew faster than other paint finishes. For this reason, they’re not recommended for high-traffic areas or rooms with high humidity, like bathrooms and kitchens.
- Eggshell: Eggshell-finish paints boast a subtle, smooth sheen and are recommended for living areas with moderate traffic and wall contact. While they wipe down cleaner than matte paints, they aren’t the most durable, so they shouldn’t be used on walls or areas that are particularly susceptible to dirt. Eggshell paints are also OK to use in those rooms that are likely to be exposed to humidity.
- Satin: Satin has a slightly higher gloss than eggshell, which gives it better stain resistance and durability, so it’s good for high-traffic areas. Charters calls it the “best all-around interior paint.”
- Semi-Gloss and Gloss: Semi-gloss and gloss paints have a higher reflectivity and brighter sheen than the other finishes, which helps makes them ultra-durable and easy to clean. These finishes are most often used for trim and woodwork.
As you’re considering your options, Jerry Klein, DVM, emergency department head, emeritus at MedVet Chicago and chief veterinary officer of the American Kennel Club, suggests avoiding paints with the following ingredients:
- Polyurethane
- Formaldehyde
- Ammonia
- Acetone
- Fungicides
- Biocides
Look for paints that are branded as “nontoxic” and are free from heavy metals. Those labeled as “no VOC” or “low VOC” are even better options, like Sherwin-Williams Harmony, which has a zero VOC formula.
According to Dr. Klein, VOCs are “especially concerning” for children, pregnant women and people who are immunocompromised, but inhalation of VOC paint fumes might also cause issues for birds, small mammals, young kittens and puppies, pregnant dogs and cats and pets with compromised immune or respiratory systems.
If you’re shopping for pet-safe paint online, the paint brand’s website is likely to list the formula’s specifications and VOC number. If shopping in person, don’t be shy about asking!
Time to see that carefully chosen color IRL! Charters says those little cardboard swatches you often see in stores are too small to judge how the paint will look on a wall. He recommends asking your paint supplier for a small paint pot sample, so you can paint a section of wall and determine if it’s the result you want.
Levy similarly suggests painting a 2 ft x 2 ft square on a wall and periodically checking out how it looks over a few days and in different lighting: “Natural light, artificial light sources and environmental influences (Think: sunlight shining through green leaves of a tree) all affect the color,” Levy explains, so a test run is a great way to see if you love the look no matter the lighting or time of day.
Tips for Painting Your Home Like a Pro
So you’ve selected your shade? Great—now it’s almost time to roll up your sleeves and start painting!
Here are some must-have tips from Charters to help you get your DIY job done:
First, stock on all the supplies you’ll need. In addition to paint, be sure to have the following:
- Paint roller
- Paint tray
- Painter's tape
- A few brushes
- A step ladder
- Rags
- Drop cloths and plastic sheeting to protect areas not being painted
- A screwdriver and hammer to remove light switches, outlets and nails
Keep your work area clean, organized and free of clutter—like all those dog toys that are usually lying around!
Create a work surface to keep your tools, paints and trays accessible to you, but away from pets. For instance, set up a folding table in the room that you can cover with a cheap tablecloth and use to set up your supplies.
Remove light switches and outlets before painting. (You don’t want to accidentally paint over them, or have to pause mid-roll!)
Repair any nail holes, cracks, or nicks in your walls prior to painting. (You can learn how here—and it’s easier than it sounds!)
Apply painter’s tape along trim and molding of the room, as well as around windows and doors to keep your lines crisp and clean.
Apply primer (an undercoat that’s applied and allowed to dry before colored paint) using a brush to paint the edges and a roller for the walls. Sure, it’s an extra step, but this will allow for better adhesion of your colored paint, as well as increased durability.
How to Keep Your Pets Safe While Painting
To help keep your four-legged loved ones safe while getting your DIY on, we spoke to some veterinarians for their advice.
Keep pets out of the work area
Dr. Gavin Casper, DVM, CVA, CVC, of Hometown Animal Hospital in Weston, Florida, says it’s best to keep pets out of the room you’re painting since these naturally curious creatures could potentially eat or inhale some paint.
If possible, send your fur babies to daycare or to spend the day with a family member or friend. If that’s not an option, open as many windows as you can throughout your home for air circulation, says Dr. Casper. Keep pets away until the paint is dry and fumes are gone.
Thoroughly clean the room and dispose of (or store away) all paint products
Dr. Casper says it’s important to make sure you clean up and throw out all paint products, or store them away for future use once you’re done painting. That includes paint cans, trays, brushes, drop cloths and other tools. This will help ensure your dog or cat doesn’t find a stray paint brush you left somewhere and decide it’s a fun new chew toy.
What if my pet gets paint on their fur?
If paint does happen to get on your naturally curious pet, stay calm. If it’s latex paint, simply shampoo the area using a mild soap and rinse it well with water, instructs Dr. Klein. If it’s an oil-based paint, keep your pet from licking the wet paint until it dries, then cut off the painted hair.
You can find pet hair clippers and trimmers here—or see if your groomer is available for a last-minute session. Either way, it’s best not to leave your pet with paint on their fur: They could try to groom (i.e. lick) themselves and end up ingesting the paint.
What’s most important to remember is you should never use turpentine or paint thinners to remove the paint, as they can be more dangerous if eaten or even burn your pet’s skin.
What if my pet eats paint?
If you witness your pet taking a taste of paint, or spot some suspicious color around their mouth, Dr. Klein says to call your veterinarian or the Pet Poison Helpline at (855) 764-7661 immediately. They’ll instruct you on how to proceed (such as making an emergency trip to the vet).
Indoor latex paint isn’t usually toxic unless your pet eats a lot of it. In the event that does occur, they could experience vomiting and/or diarrhea. Oil-based paints, on the other hand, are considered toxic at any ingested amount, says Dr. Klein. These paints can lead to aspiration pneumonia and coughing, as well as neurological issues like wobbliness, tremors, and/or seizures.
Again, your vet or the Pet Poison Helpline can instruct on how to proceed—but never induce vomiting unless specifically recommended, Dr. Klein adds.
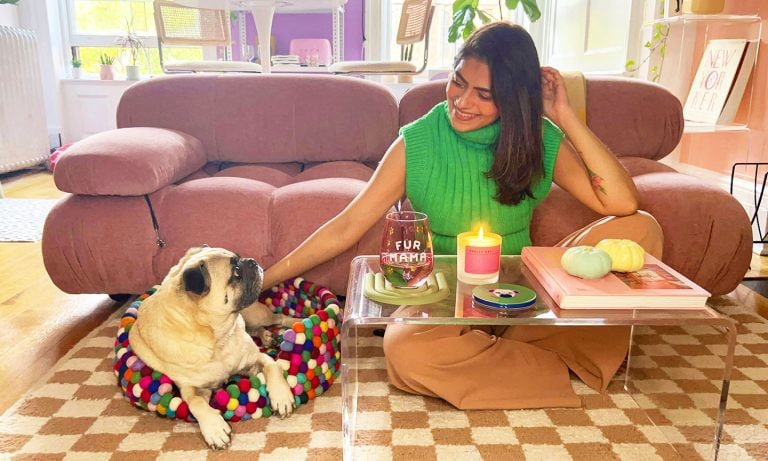
Once all the painting is done and has dried, everything is cleaned up and you’ve welcomed your pet back into the new-and-improved space, it’s time to enjoy your DIY success! Now all that’s left is to sit back, snuggle up with your furry friend, and start thinking of what Fixer Pupper project to tackle next.
Share: