Unless your kitty is constantly wearing nail tips, cats and leather typically don’t mix. But don’t despair if your feline has made your expensive furniture into their scratching post—it may not be beyond repair. We talked to furniture experts to find out how to repair cat scratches on leather chairs, sofas and more.
In This Guide
DIY Vs. Professional Repairs
Can you really repair leather yourself? The short answer: maybe. According to Rachel Wilson of Hub Leather Repair & Restoration in Framingham, Massachusetts, the best way to repair scratched leather is to leave the job to the professionals. “We’ve just seen too many DIY disasters,” she says.
That’s because the process of repairing leather is long and complex. The most difficult steps are sanding and color-matching. If you sand too hard, you can damage the leather, and matching the exact shade of your leather chair or couch is also a challenge. Sunlight and moisture affect the color of leather furniture over time, making it difficult to get an exact match. Even the type of leather can add difficulty to the DIY project. For example, if your furniture is made from aniline leather, it’s dyed, making it harder to recolor and repair.
If you’re interested in custom leather repair, be prepared for an investment. According to HomeAdvisor, leather sofa repairs start around $100 for a single cat scratch, while more complex fixes can cost thousands. Quality leather repair is an art form, so it’s always best to ask for local recommendations from family and friends. You can also check reviews on sites such as Yelp, Google, or Angi.
On the other hand, if you have a knack for DIY projects and want to try fixing that scratch yourself, read on for tips.
Types of Cat Scratches on Leather

Different types of cat behavior create different scratches in your leather sofa, which require different repair techniques. There are two main kinds of scratches that cause damage to leather:
- Kneading: When your feline friend feels content, they may start kneading, aka pushing and pulling their front paws against a surface. (Our favorite nickname for this behavior is “making biscuits.”) Though it’s undeniably adorable, kneading on furniture can leave tiny scratches and tears in the leather finish.
- Swiping: A cat running or swiping their claws across a leather surface can leave a noticeable long slash, rip or scuff behind.
Whether your cat has kneaded or swiped the surface of your leather furniture, the cat scratches still leave permanent marks on the leather's finish. Removing them requires sanding and recoloring—so sorry, but there’s no quick fix here. (At least not one that will make your furniture look brand-new.)
How to Repair Cat Scratches From Kneading

Follow these steps to repair pilling and tiny scratches caused by your cat’s biscuit-making.
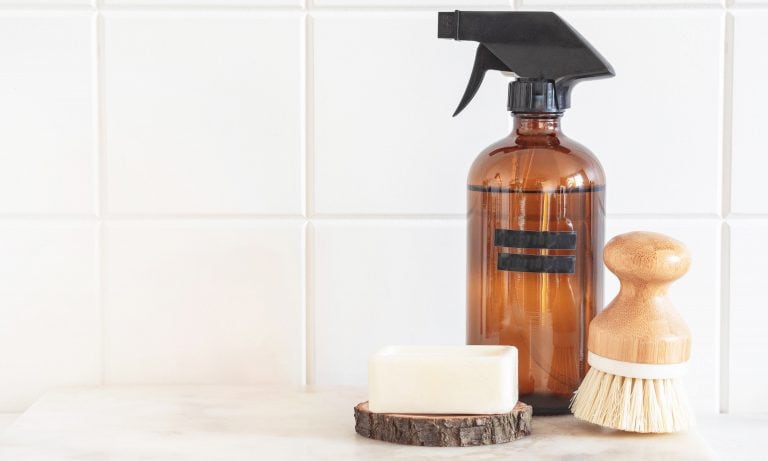
1 Gather Your Supplies
- Leather cleaner
- Scissors
- Sponge
- Paintbrush
- Leather binding glue
- Sandpaper
- Leather putty
- Liquid leather colorant
- Leather color spray
- Leather sealant
- Leather finish
2Clean the Scratched Area
Prepare the damaged area by thoroughly cleaning any grime or dirt off with a cleaning product specifically designed for leather. Any professional leather care service can recommend a quality brand, often sold in their stores.
3Trim the Loose Fibers
Trim any loose fibers by clipping with scissors as close to the base of the pilling as possible, being careful not to cut, puncture or cause further damage. Any shorter hairs left behind will not affect the feel and look of the end result, nor the quality of the repair.
4Apply Leather Glue
Put a small amount of leather binding glue onto a sponge and rub it into the damaged area. Allow time for the first coat to dry, and re-apply 7 to 9 times (with sufficient drying time between each application) to ensure a long-lasting, strong repair.
5 Lightly Sand the Area
Use fine sandpaper (1200 grit) to lightly smooth the area treated with leather glue. Take your time and use a gentle touch to avoid roughing up the repair. A proper sanding job will produce an even, smooth surface to provide the base for the rest of the repair process.
6 Apply Heavy Filler
Remove any sandpaper residue, then apply the heavy filler, a sort of leather putty. Using a palette knife, spread the filler in a thin layer on top of the scratches. Allow the filler to dry for 20 to 25 minutes, inspect your work, and reapply an additional layer if needed to fill in gouges, deep scratches, and holes.
7Sand the Area Again
Once the heavy filler has dried, take your sandpaper out again and smooth out the repaired area. Remember to use a light touch. After it’s sufficiently sanded, wipe down the leather with the special leather cleaning solution to remove any sandpaper residue or dirt. The repaired area must be clean in order for the colorant to adhere to the leather.
8Apply Liquid Leather Colorant
After the leather cleaner has dried, put a small amount of liquid colorant on a fresh, clean sponge and apply a thin layer to the repaired area. This will putting the color back into your leather—but sometimes it also reveals spots that need some extra repair. If so, restart the process from step 6—reapply more filler, sand it down after it has dried, and reapply the colorant again.
9 Apply Leather Color Spray
Once the first coat of colorant has been applied and dried, a spray-on colorant that comes with an airbrush should be swept over your repair in single layers. Let each application dry before applying the next. Apply as many thin layers of colorant as needed to completely blend in the repaired area with the intact area and to hide the repair.
10Apply Leather Sealant
Apply leather lacquer (also called leather sealant) to seal the color in and prevent rub-off or fading. Using a clean sponge or airbrush, apply the sealant in 2 or 3 layers to enhance the repaired leather’s flexibility and sturdiness. Let each layer dry thoroughly before applying the next.
11Apply Leather Finish
The final step is to apply a leather finish product, again in thin layers with sufficient drying time in between each one. The finish should be applied with an airbrush or clean sponge in 4 to 5 layers. This seals in the work you’ve done and protects it from ordinary wear—but your cat’s nails can ruin it again, so take steps to protect your furniture. (More on that below.)
How to Repair Cat Scratches Caused by Swiping

Repairing damage done by swiping is a much simpler, quicker process. Provided the scratches are strictly on the surface and have not cut the leather apart, the lighter shade of discoloration can be hidden with a leather re-coloring balm. Simply apply the balm to hide the scratches and blend it in with the rest of the leather on the piece.
However, if the scratches have cut through the leather, no do-it-yourself fix will be adequate; it’s best left to the professionals.
Can Olive Oil Fix Leather?

Wondering if you have the tools in your pantry to repair cat scratches? Sorry. Wilson says home remedies like olive oil won’t remove cat scratches. When you add any liquid to leather, the scratched areas will absorb the liquid. This can leave your leather furniture looking worse than when you started.
That’s not the only quick fix that’s too good to be true. Over the years, Wilson has seen customers try many quick fixes, including baking soda, which doesn’t repair cat scratches either. Instead, it dries out leather furniture.
Preventing Future Leather Damage
After investing in an expensive repair (or a time-consuming DIY job), there are things you can do to keep your leather couch looking good. Cat scratches aren’t the only thing that can damage your leather furniture. Pet dander will dry out your leather chair over time. Flea and tick medications can also remove the finish from leather.
Try these tips to keep your furniture looking its best:
- Train your cat to leave your leather furniture alone with these tips for avoiding cat scratching on any type of furniture.
- Lay down a blanket or another pet-friendly surface on the sofa to serve as a barrier between the leather and their claws.
- Keep your full or top-grain leather from drying out with a general maintenance kit. (Wilson recommends maintenance products by Leather Master.) Just remember that maintenance kits are different from leather repair kits. They will not fix scratched leather, but may actually highlight imperfections.
Although the repair process can be tricky (and potentially costly), your leather can be restored so well that only you and your kitty know about the damage. Looking for more pet-friendly design tips? Check out the hottest pet home decor trends of the year.
Valerie Trumps contributed to this article.
Pets and Home Decor
Share:


