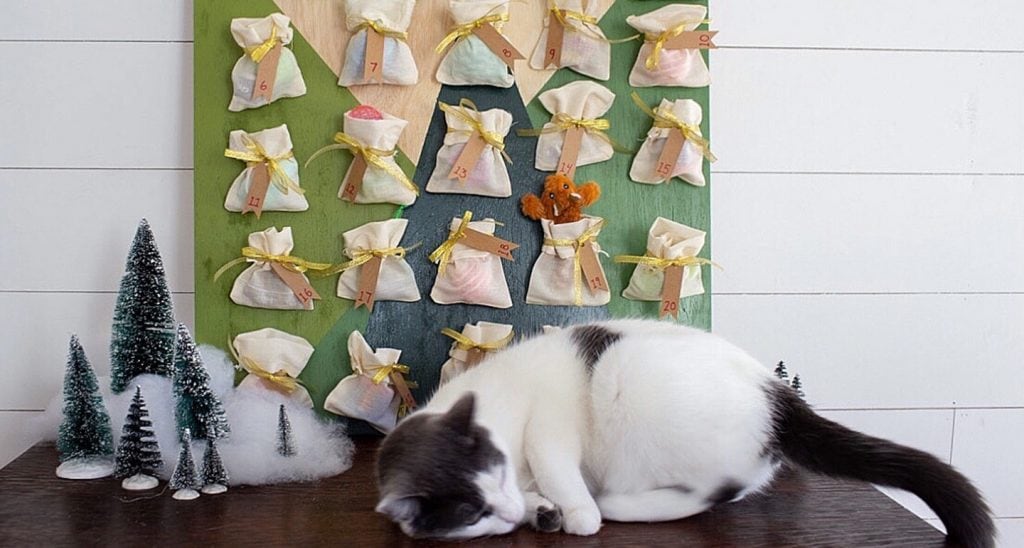
Full of fun and inexpensive treats, toys and more, this DIY cat advent calendar craft allows you and your kitty to countdown to Christmas together. And it couldn’t be easier to make!
With just a few materials (like small bags to fill with cat-approved goodies, paint and plywood and hooks you can find in any hardware store) and no crafting experience necessary, you can include your cat in one of your favorite festive traditions
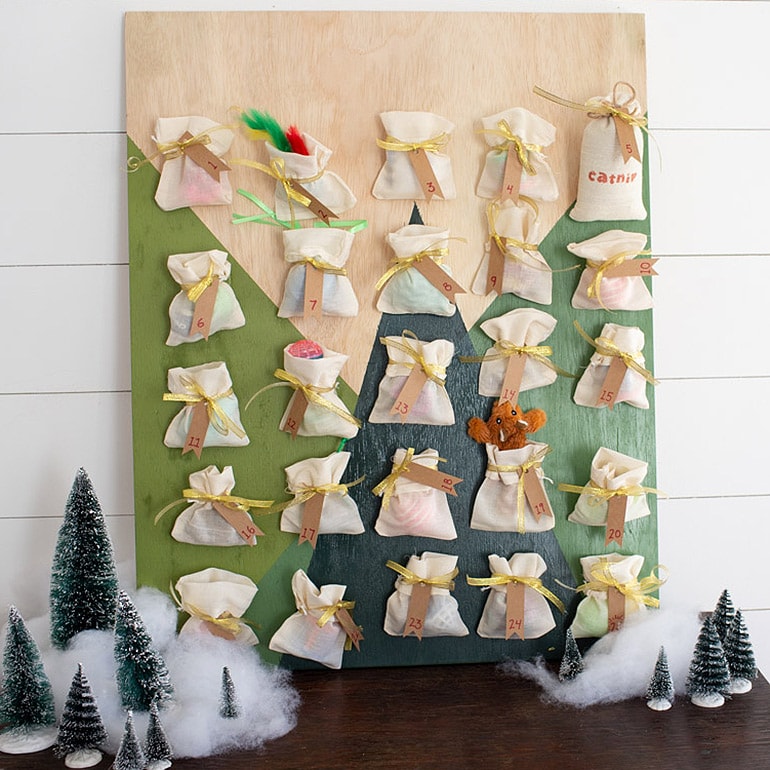
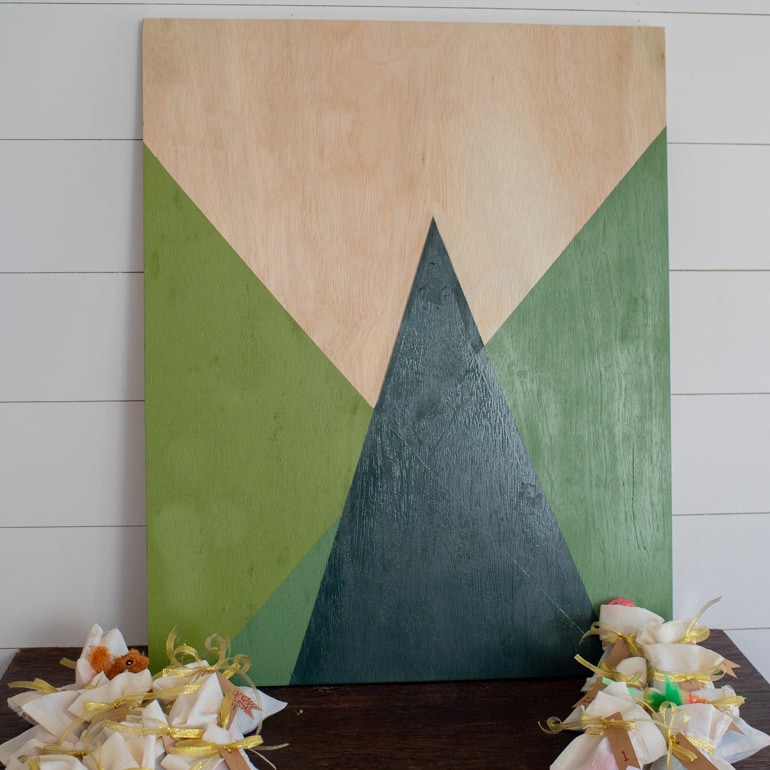
Customize the project however you see fit: Choose your favorite spray paint colors (you can go with classic evergreen colors like I did, or opt for a color palette that’s more suited to your own aesthetic), decorate the treat-toting bags if you so desire and fill each one with the treats and toys you know your cat will love.
Ready to give your cat a daily dose of the Christmas spirit? See how to make your own cat advent calendar below.
What you'll need:
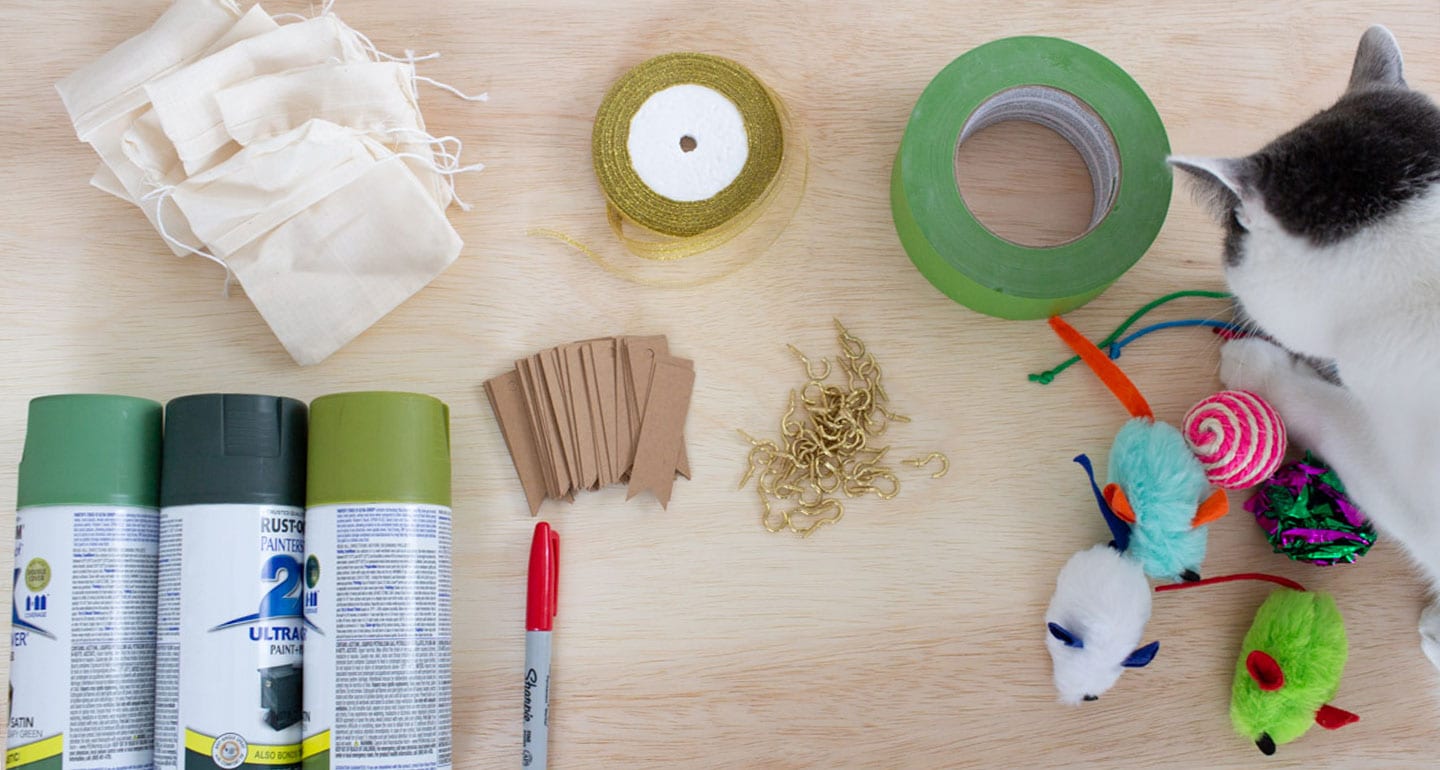
Supplies
A 24” x 30”piece of ¾” sanded plywood (You can cut an unfinished piece of wood yourself, have one cut at your local hardware store or purchase a pre-cut wooden board at a craft supply store.)
3 colors of spray paint (I used satin although any finish will do.)
Painter's tape
Gold 5/8” C-hooks
Small canvas bag (You can find these in or order them from craft supply stores.)
Paper gift tags
Permanent marker
Ribbon
Scissors
Scrap paper
Pencil
Before you get started, just a note about paint: It’s vital that choose pet-safe paint, as some paint formulas contain toxins that can harm pets even after it’s dried. VCA Animal Hospitals recommends looking for latex-based formulas and avoiding those that are oil-based, which may contain harmful solvents that can be inhaled. And always paint in a well-ventilated away from your pet.
While spray paint is a nice, easy option, you can also use acrylic craft paint if you don’t have the proper ventilation to work with spray paint. Just remember that you’ll need quite a bit of craft paint (about three tubes of craft paint per color) to cover your board, so make sure you have extra on hand.
Instructions
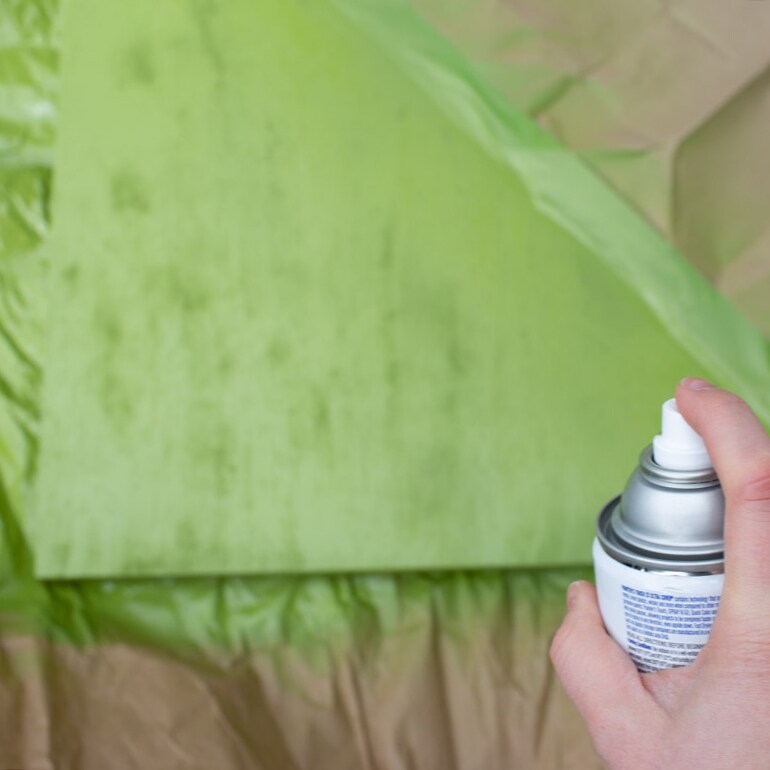
1 Apply your first paint color.
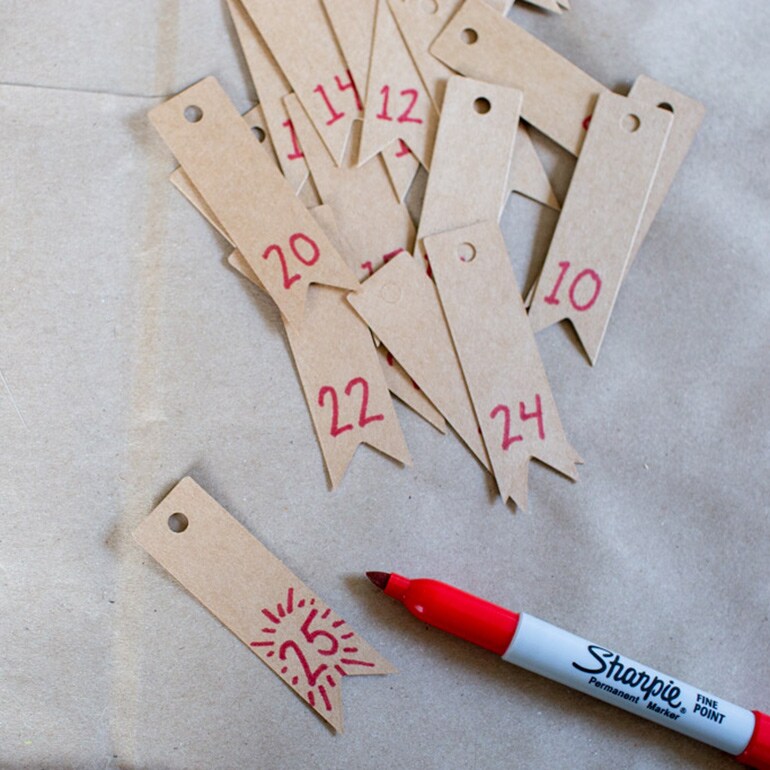
2 Write numbers on your gift tags.

3 Add a second paint color.
4 Stuff the bags with cat-approved treats and toys and tie on the tags.
Here are some fun options to include:
- KONG Laser Cat Toy
- Frisco Plush Mouse Cat Toy
- Frisco Moppy Ball Cat Toy
- Frisco Refillable Brown Squirrel Catnip Cat Toy
- All Kind 25-Count Cat Toy Variety Pack
A variety pack of cat toys is a smart way to get a bunch of fun bits to separate out into the bags. Once your bags are filled, use ribbon to tie on the numbered paper tags.
5 Apply your third paint color.
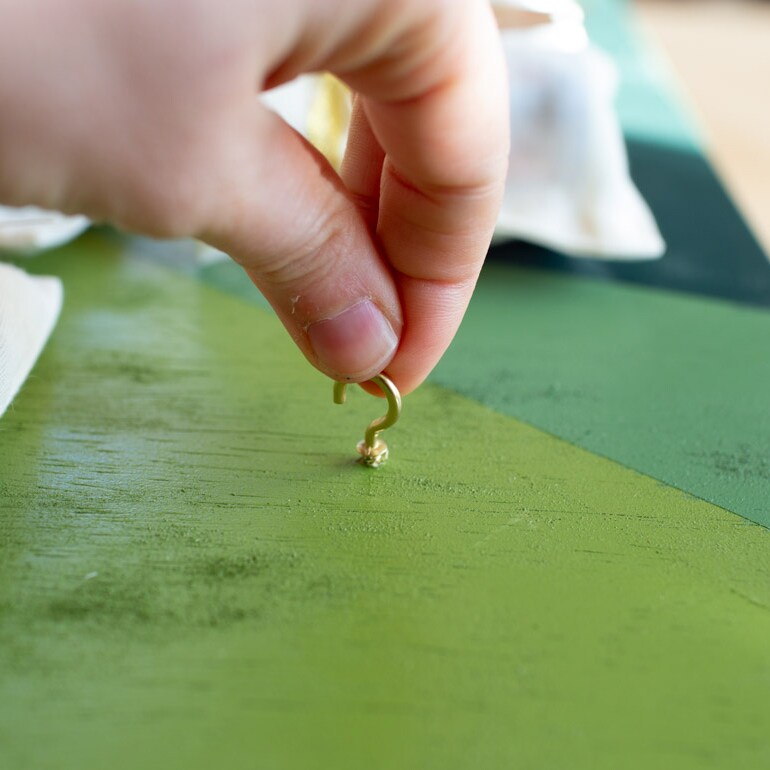
6Add hooks to the board.
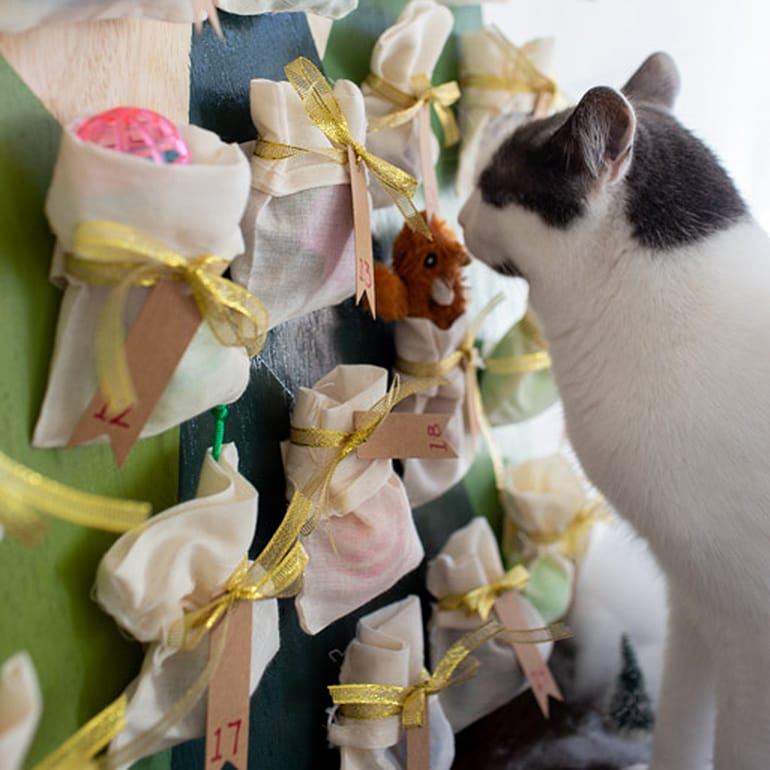
7Hang the goodie-filled bags.

Share: