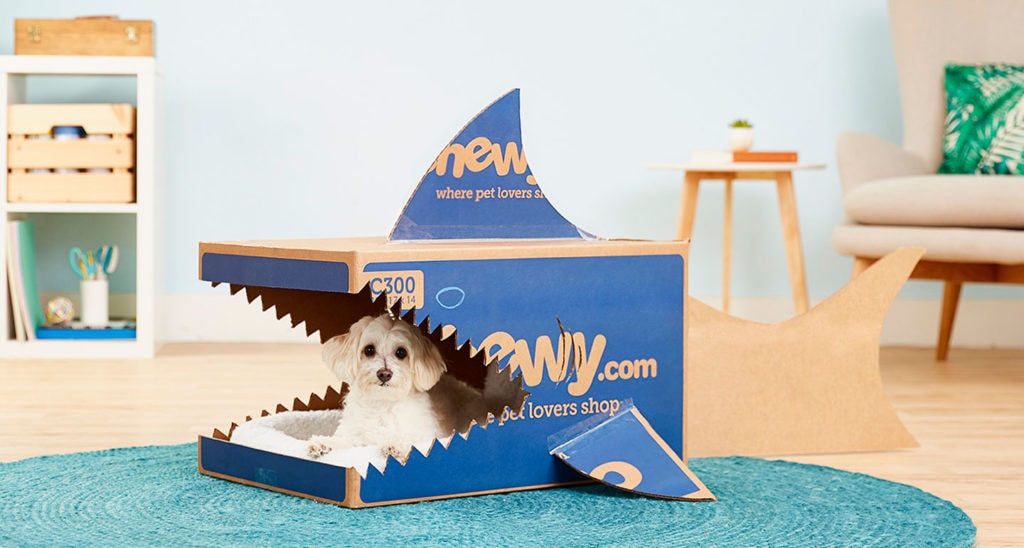
Sharks are majestic, beautiful creatures. They’re also powerful predators, and despite their beauty, it’s best to stay far, far away. But here’s one shark you—and your pup—can cozy up to.
This shark is a DIY dog house you can make out of your Chewy box. It might look difficult to construct, but our step-by-step guidance makes crafting easy. And when you’re finished, you’ll have a cool new hangout spot for your dog.
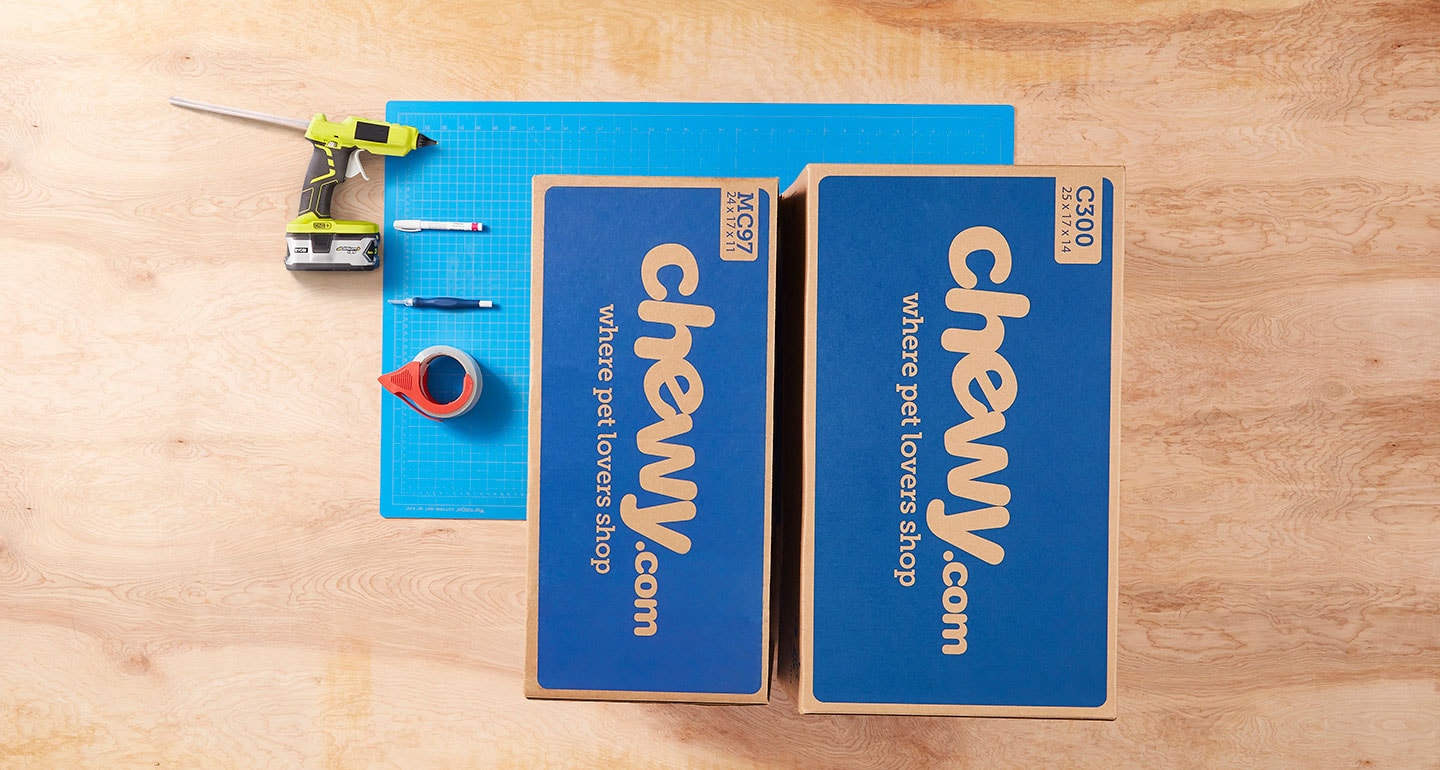
What you'll need:
Photos: Chewy Studios
Supplies
- 2 Chewy Boxes
- Packing Tape
- Box Cutter
- Glue Gun
- White Craft Marker
Instructions
1
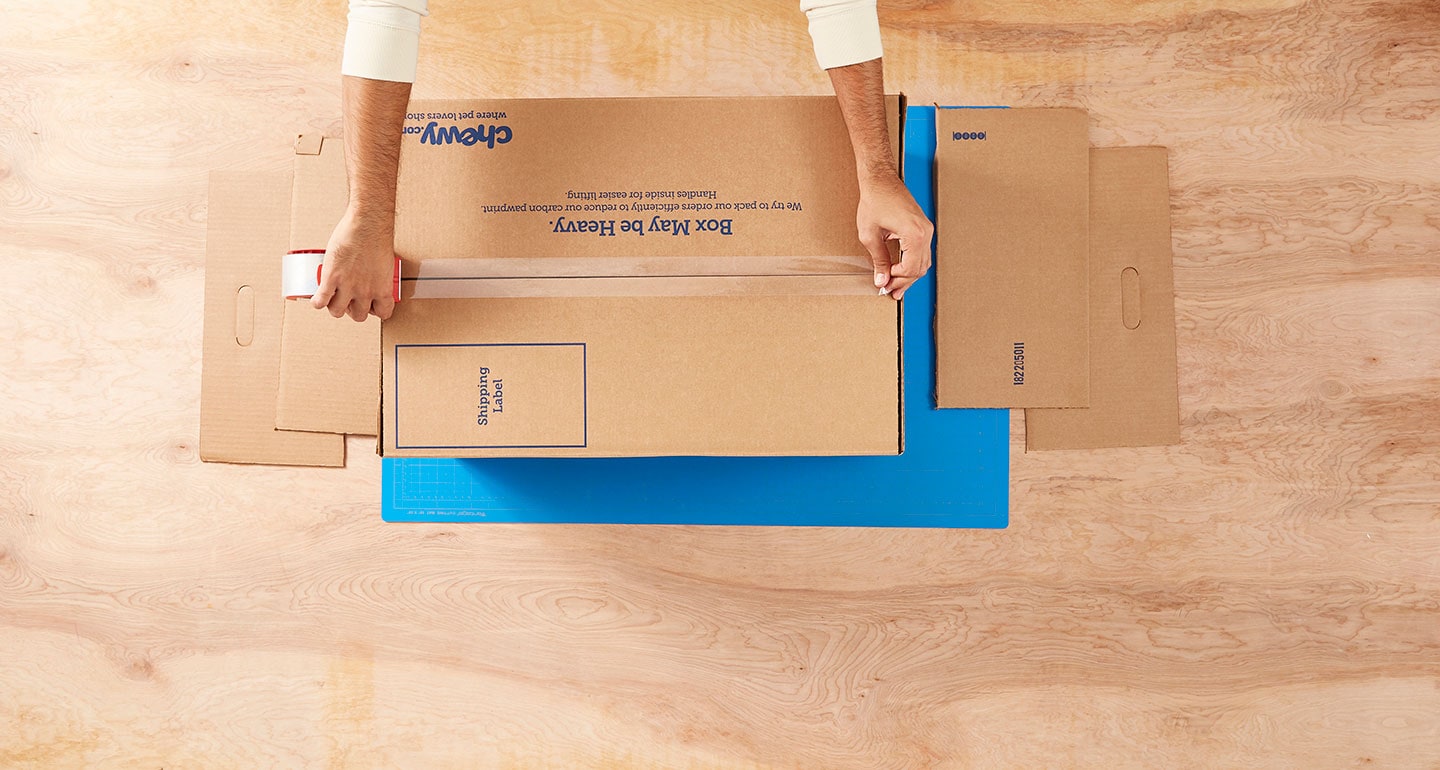
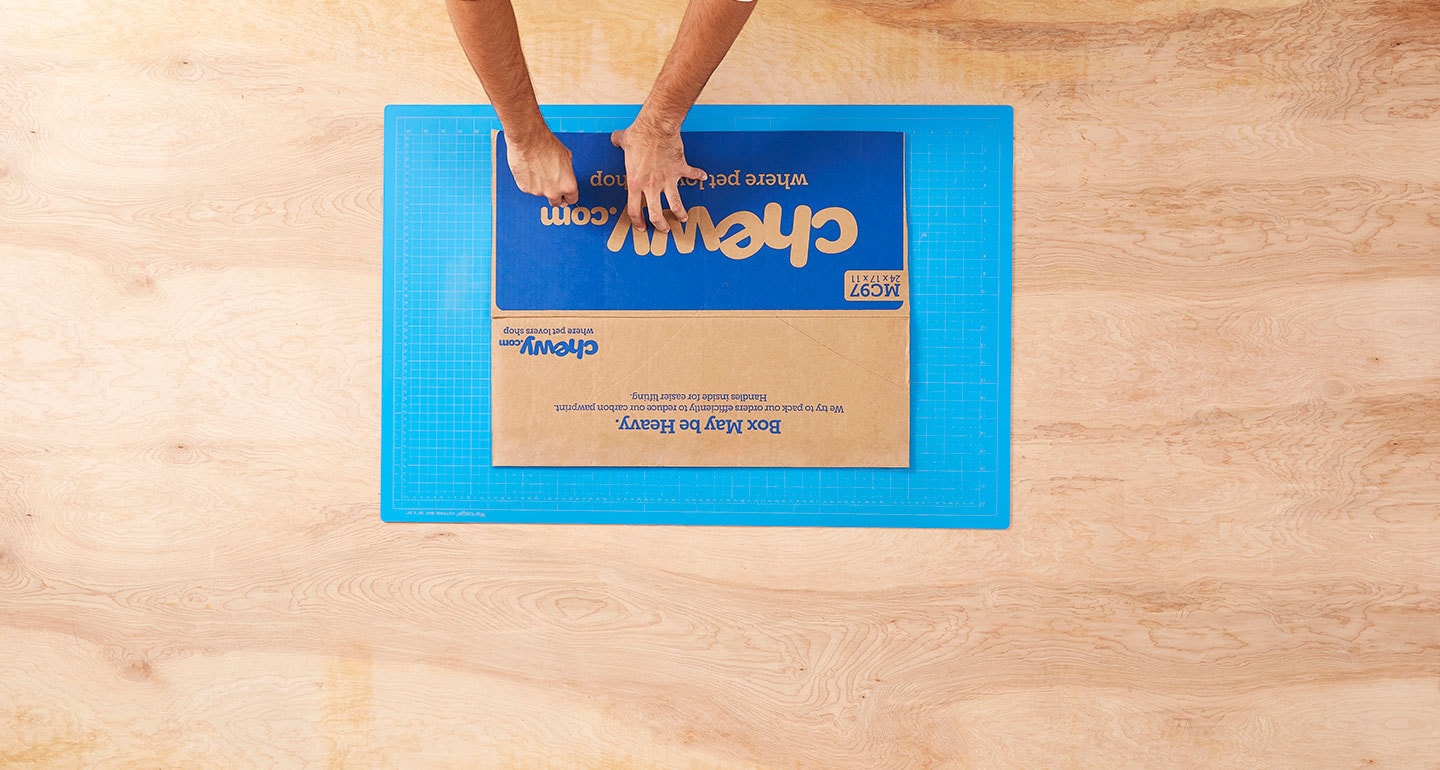
Cut the short flaps off the top of the main Chewy box
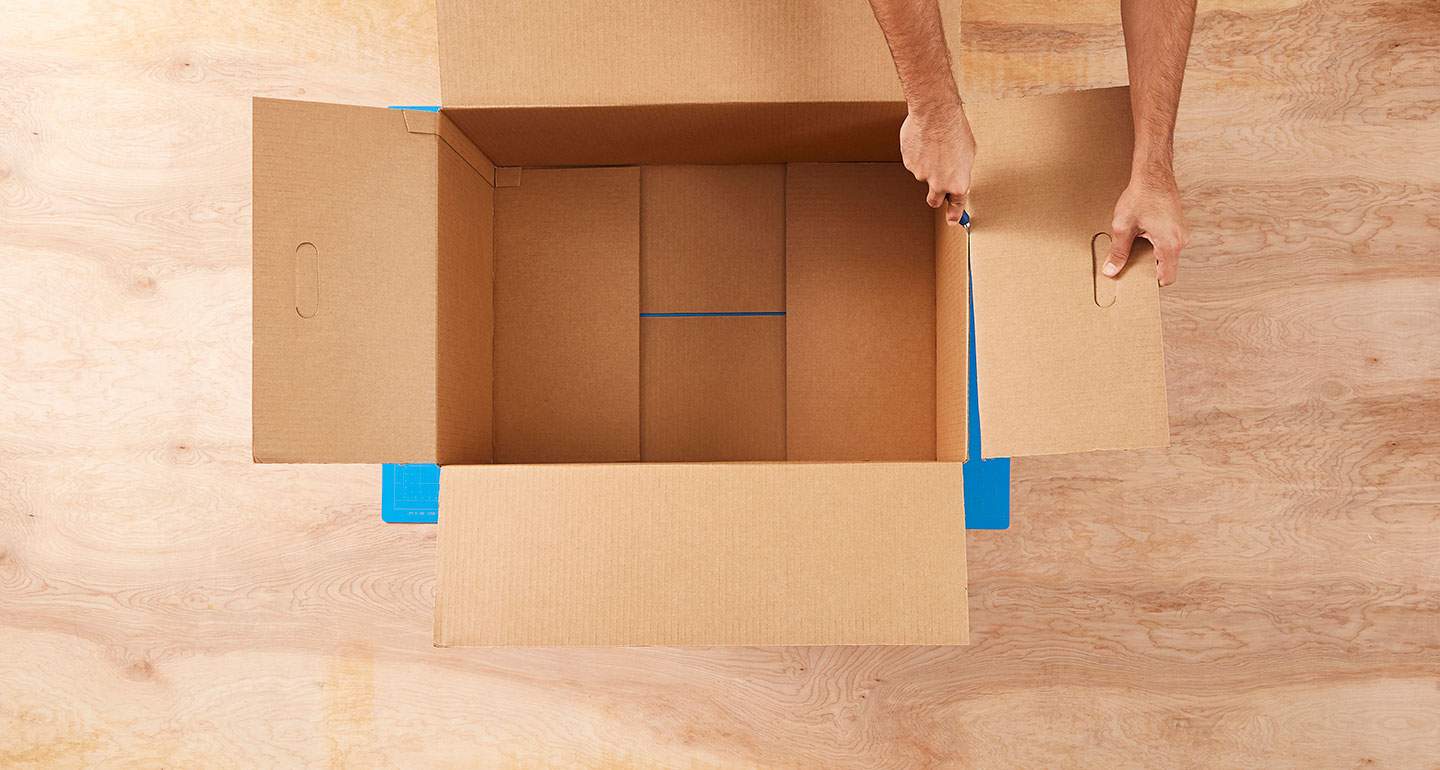
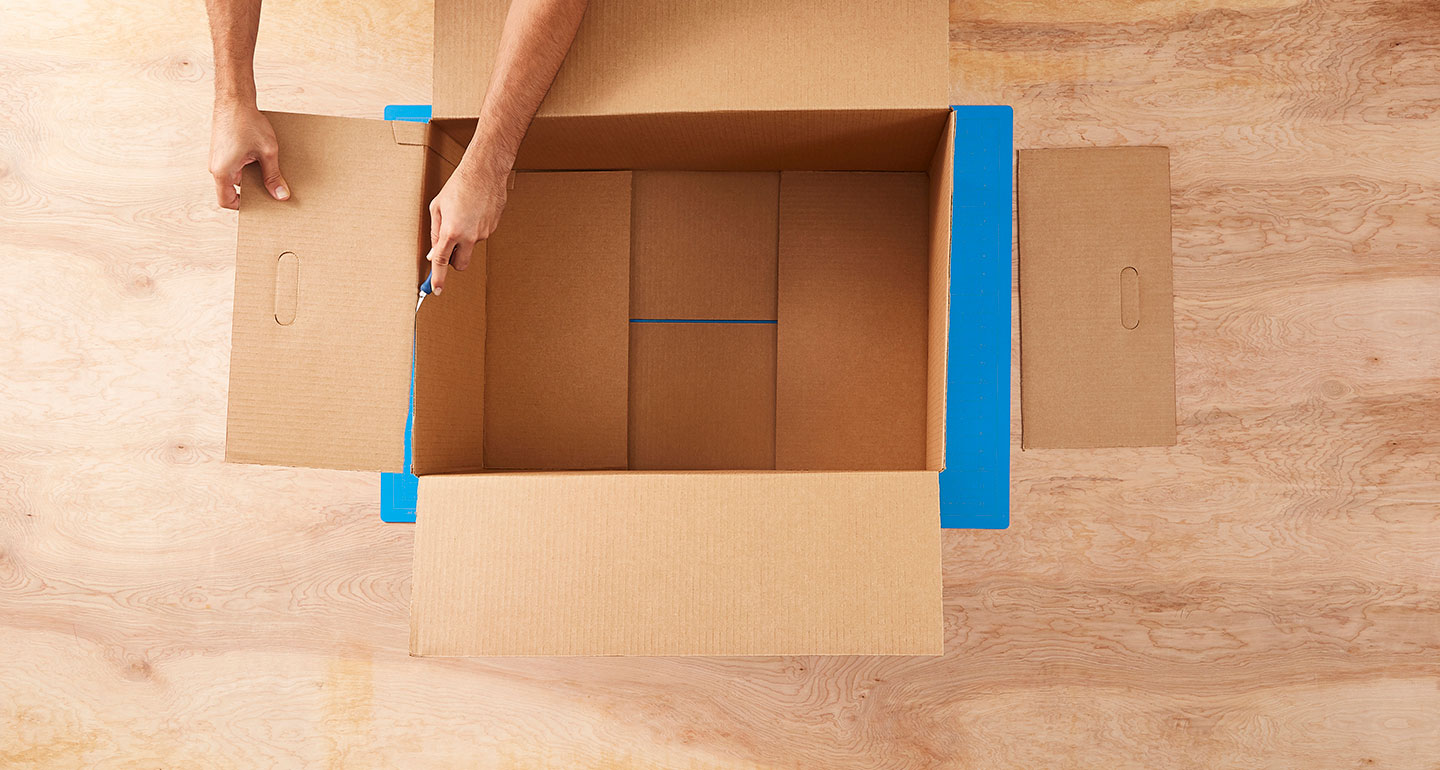
2
Cut the short flaps off the bottom of the box. Save flaps for later.
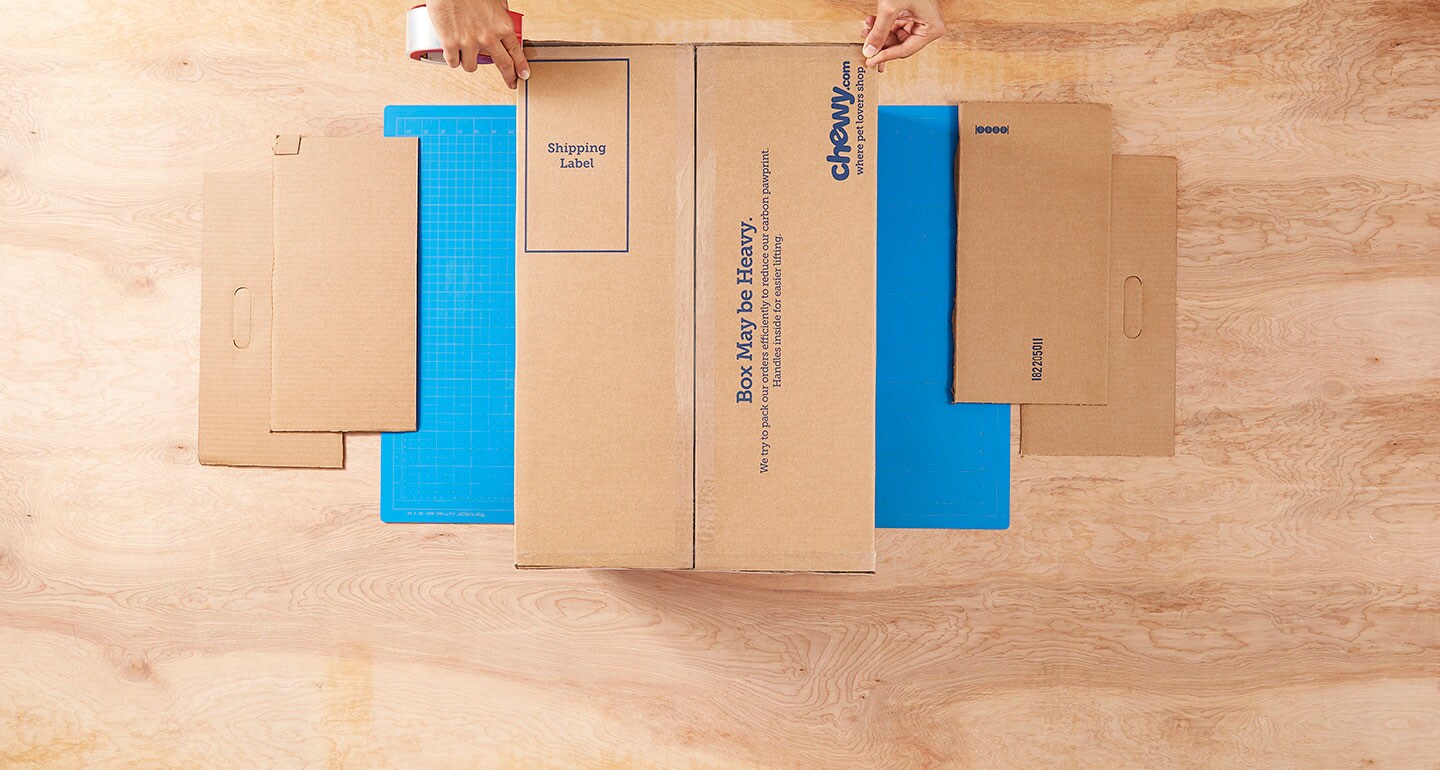
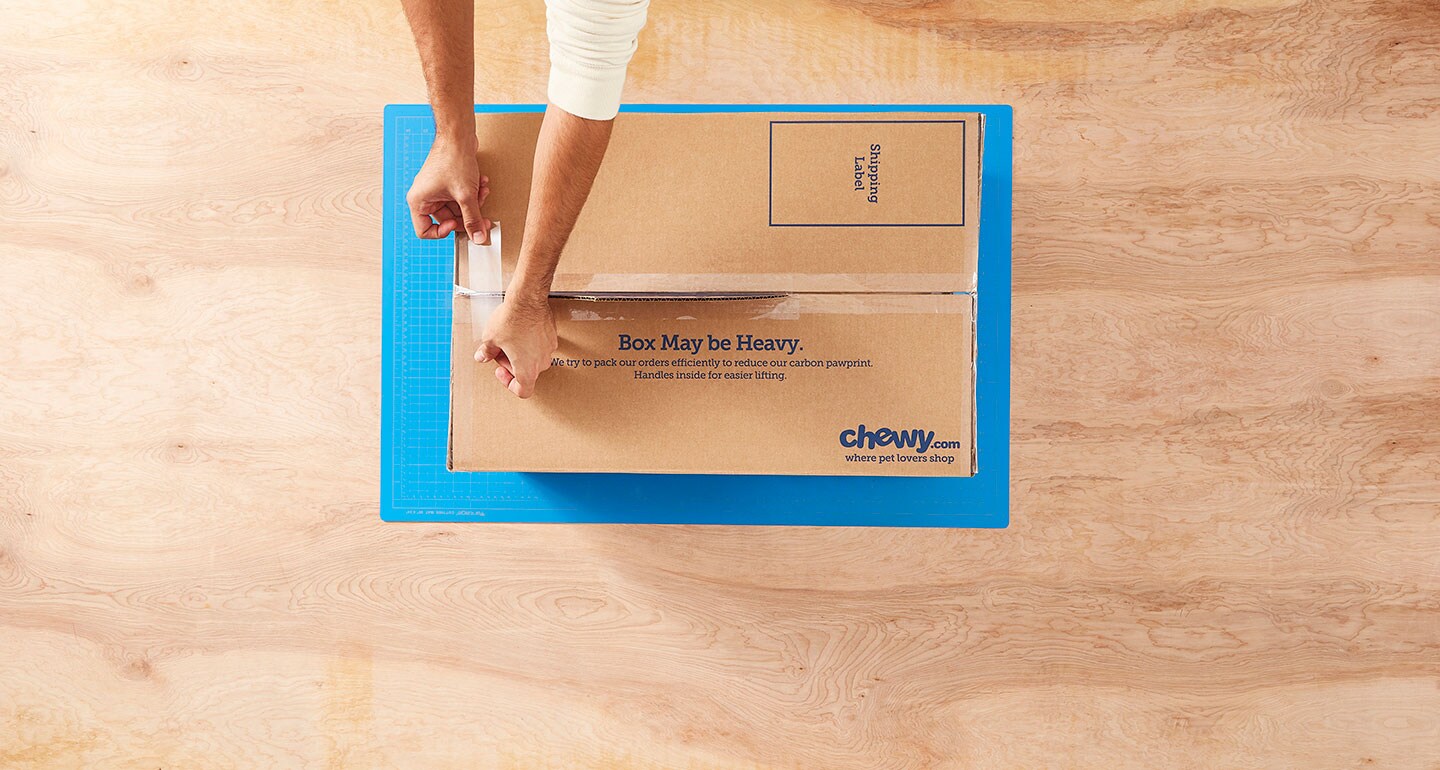
3
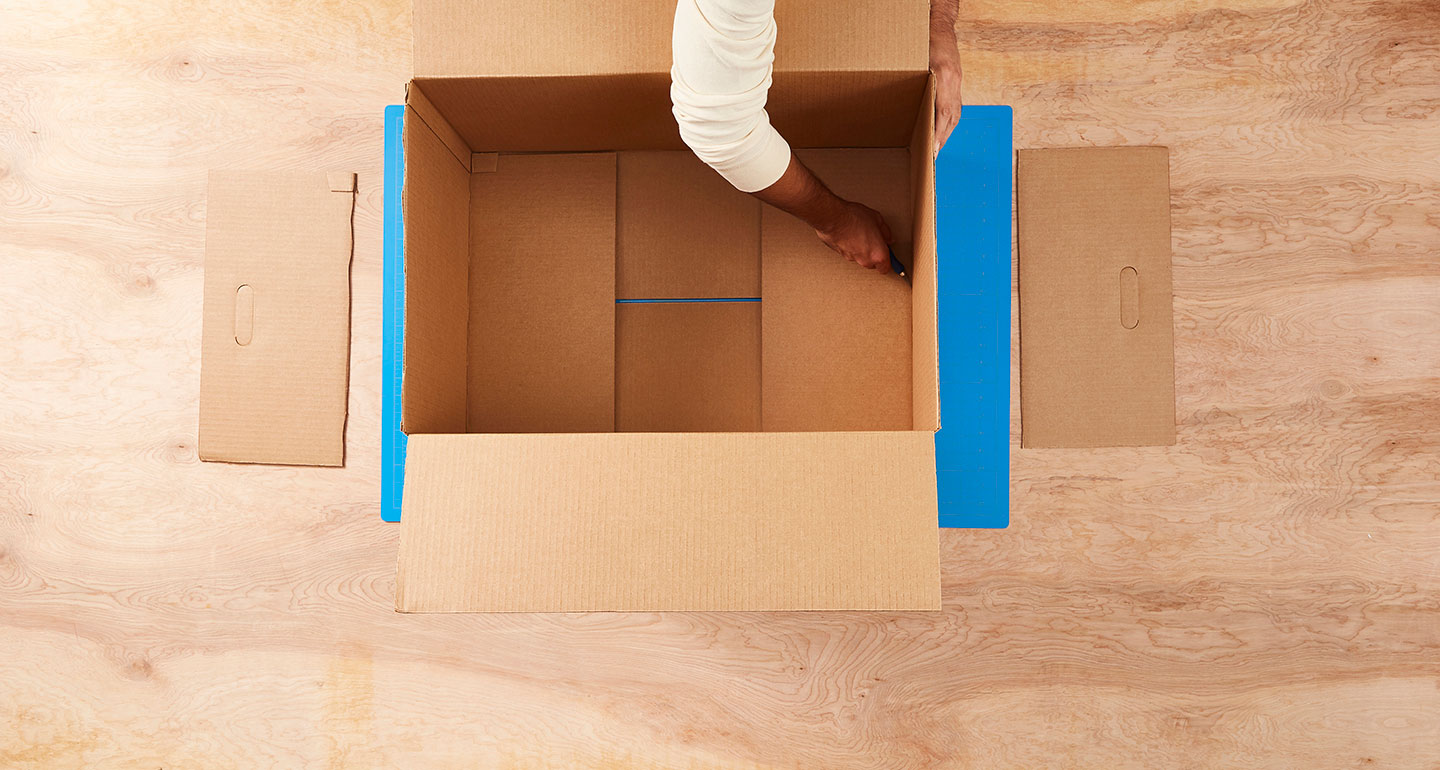
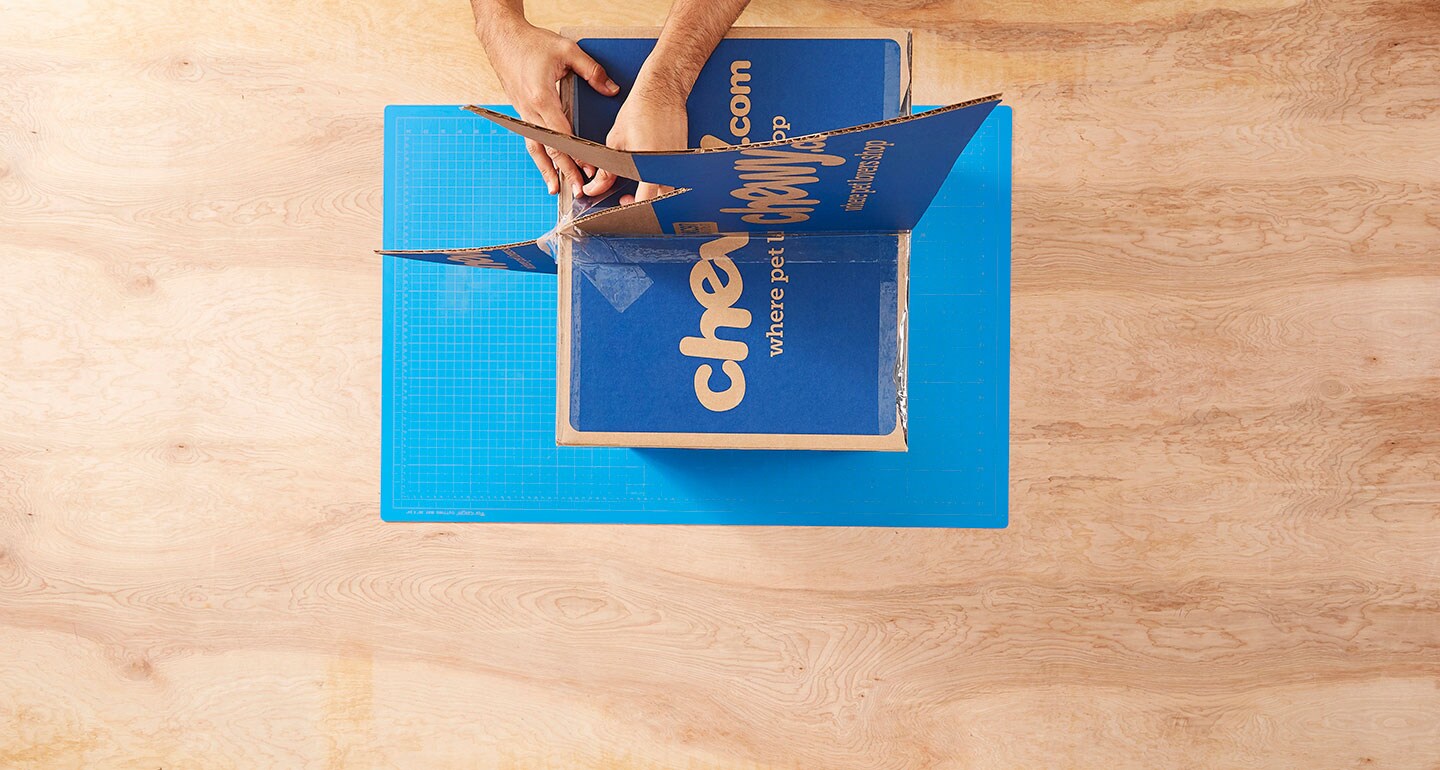
Tape the top shut.
4
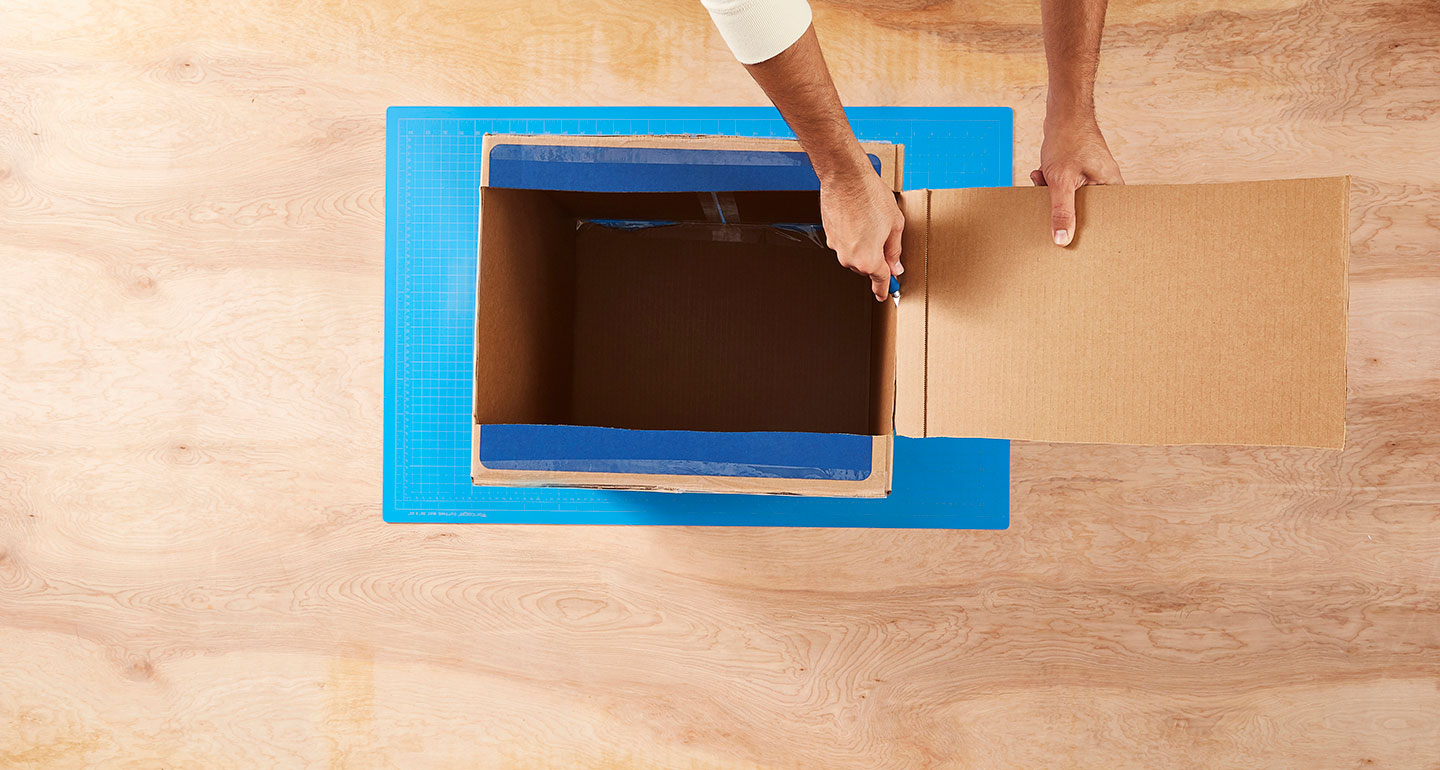
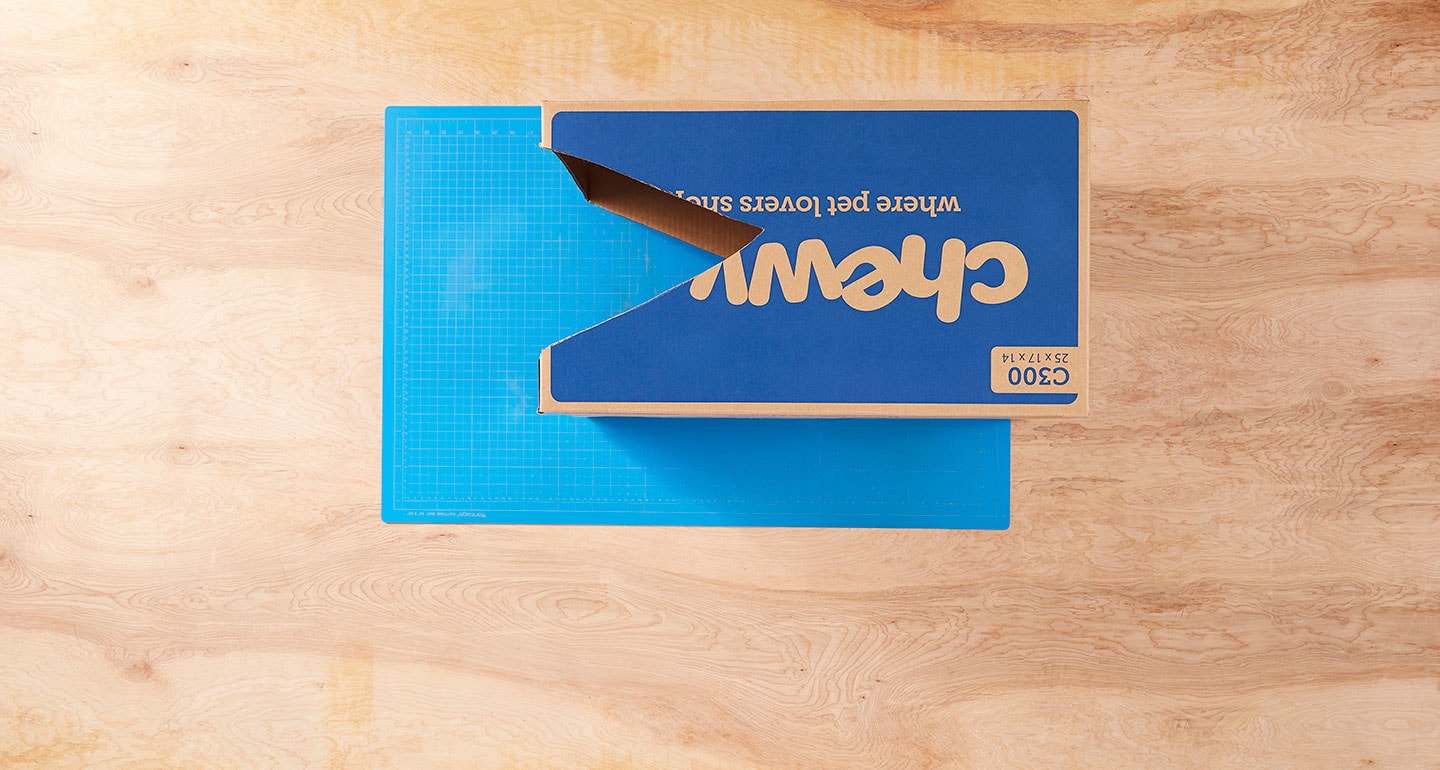
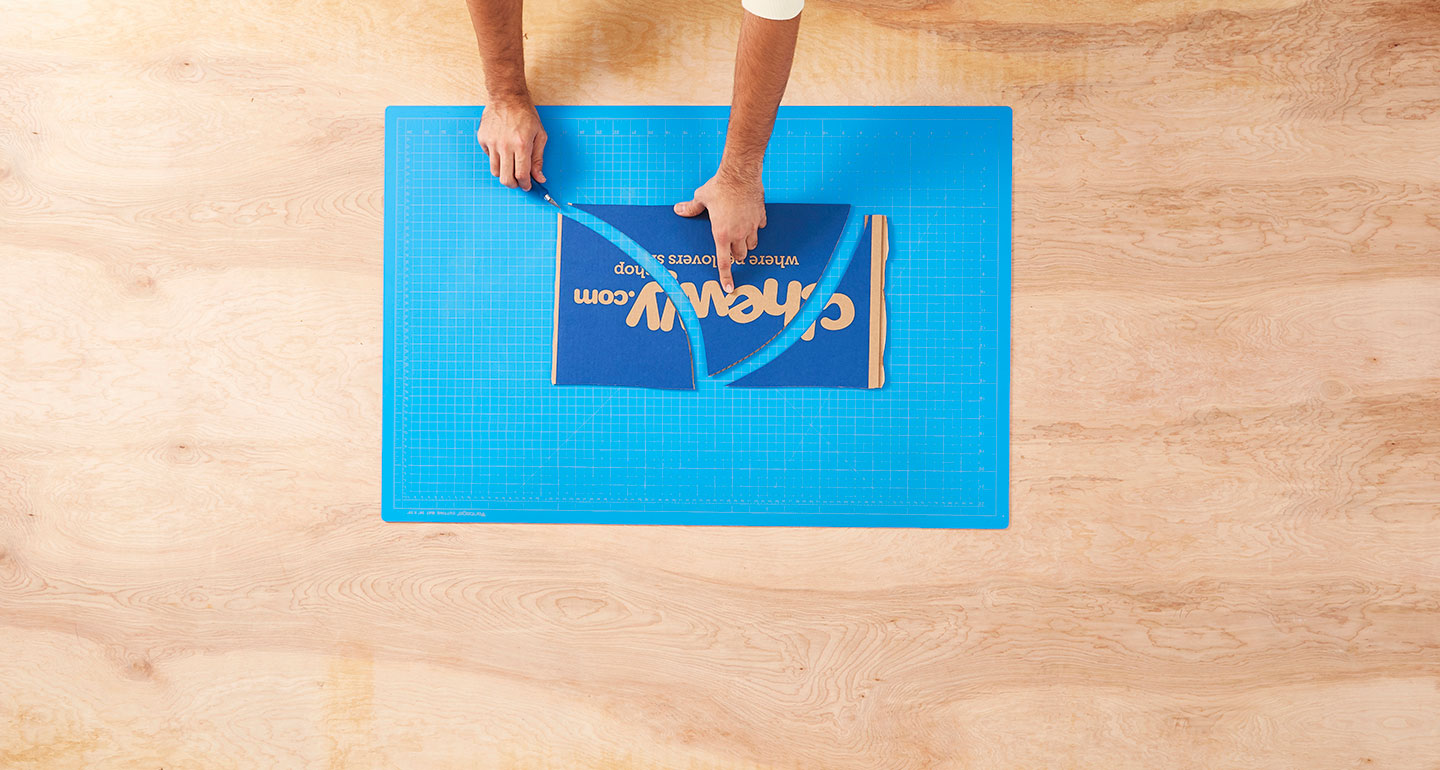
Cut out a rectangular shape for the mouth on one of the short sides.
Be sure to leave about a 3-inch strip at the top, and a 1-inch strip at the bottom, but cut along the box edges on the two sides.
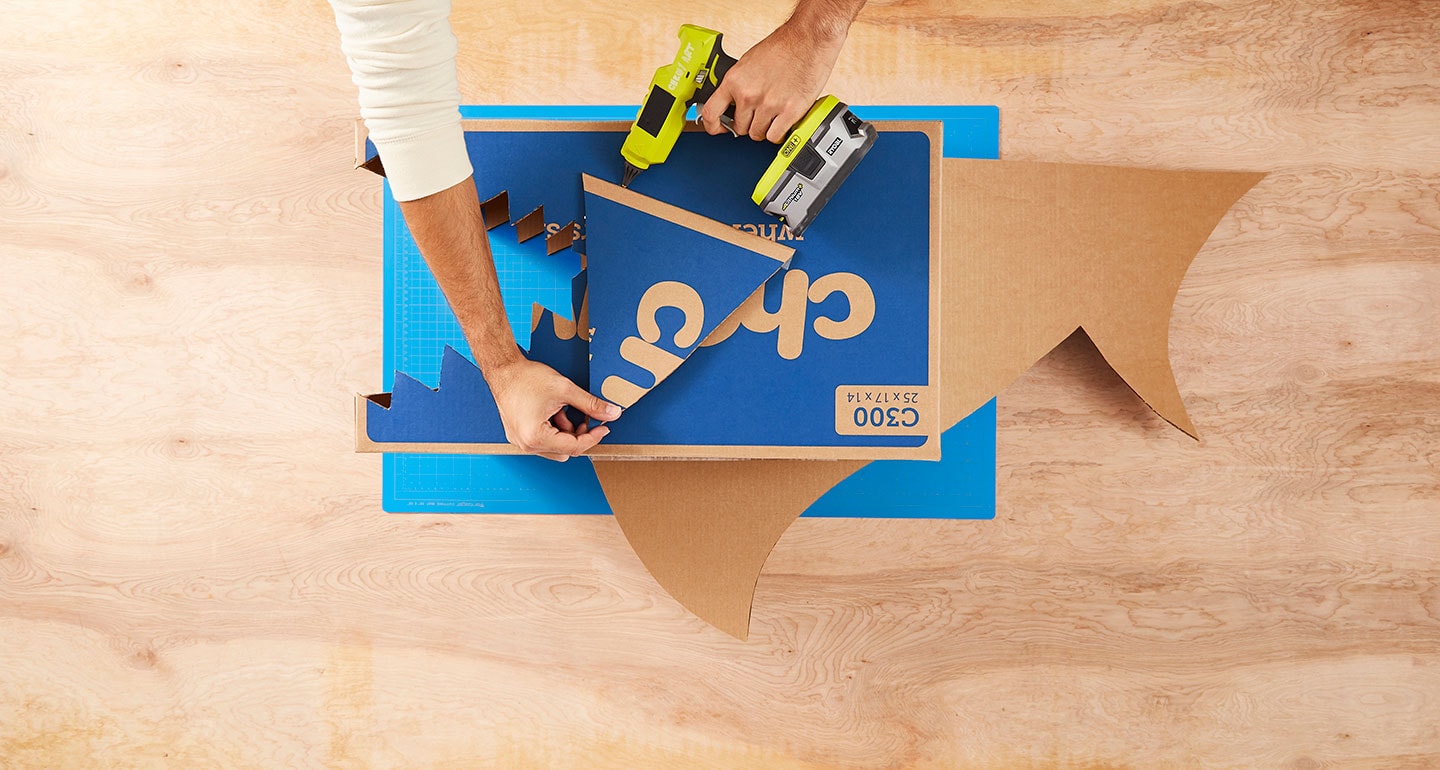
5
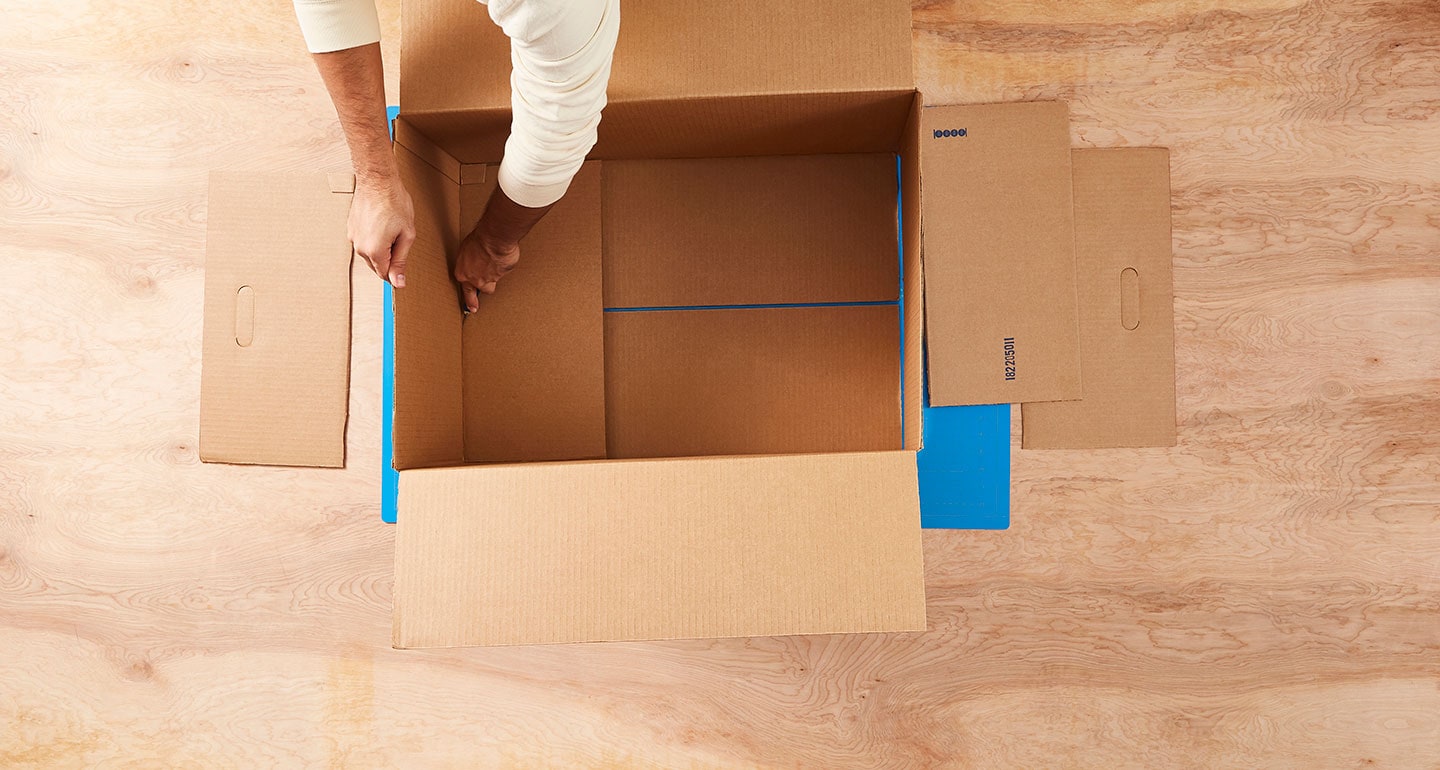
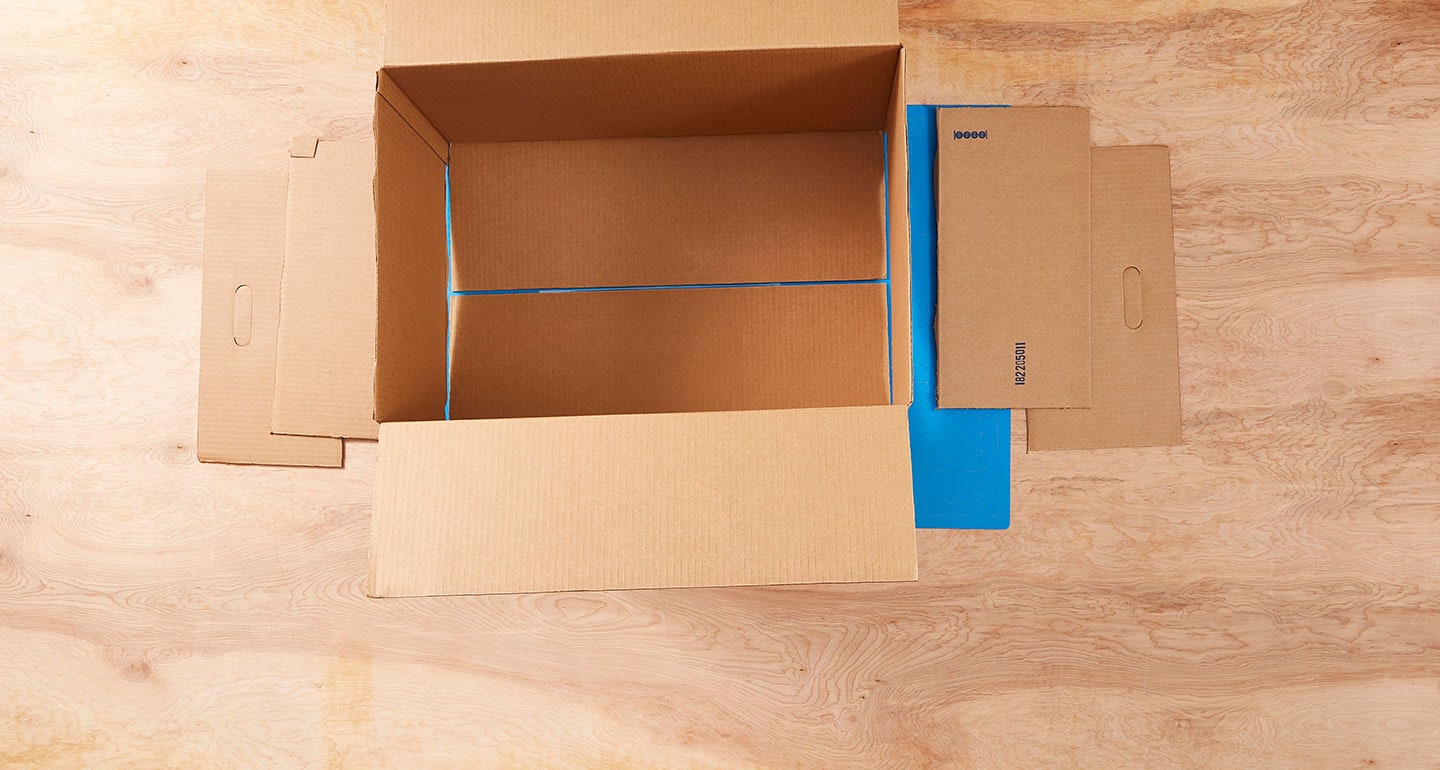
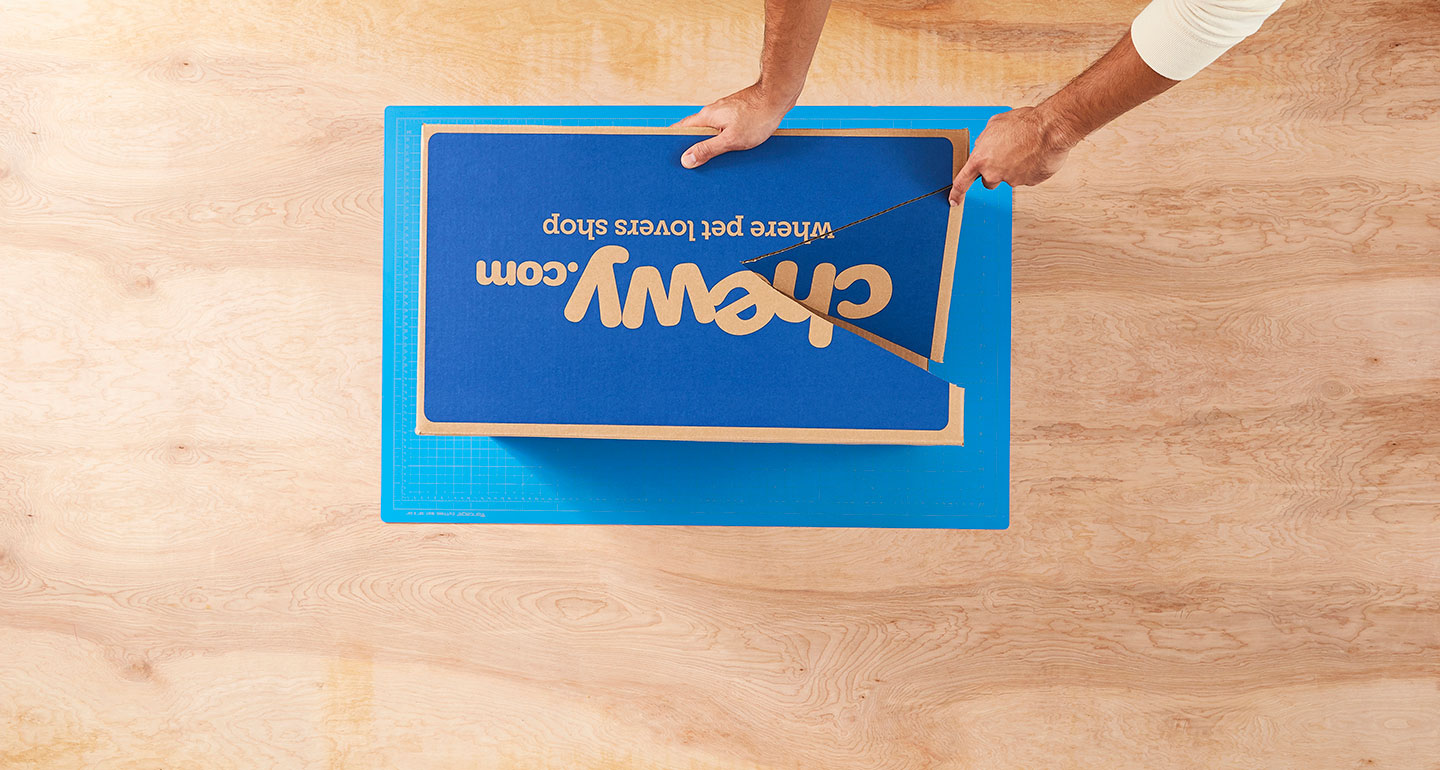
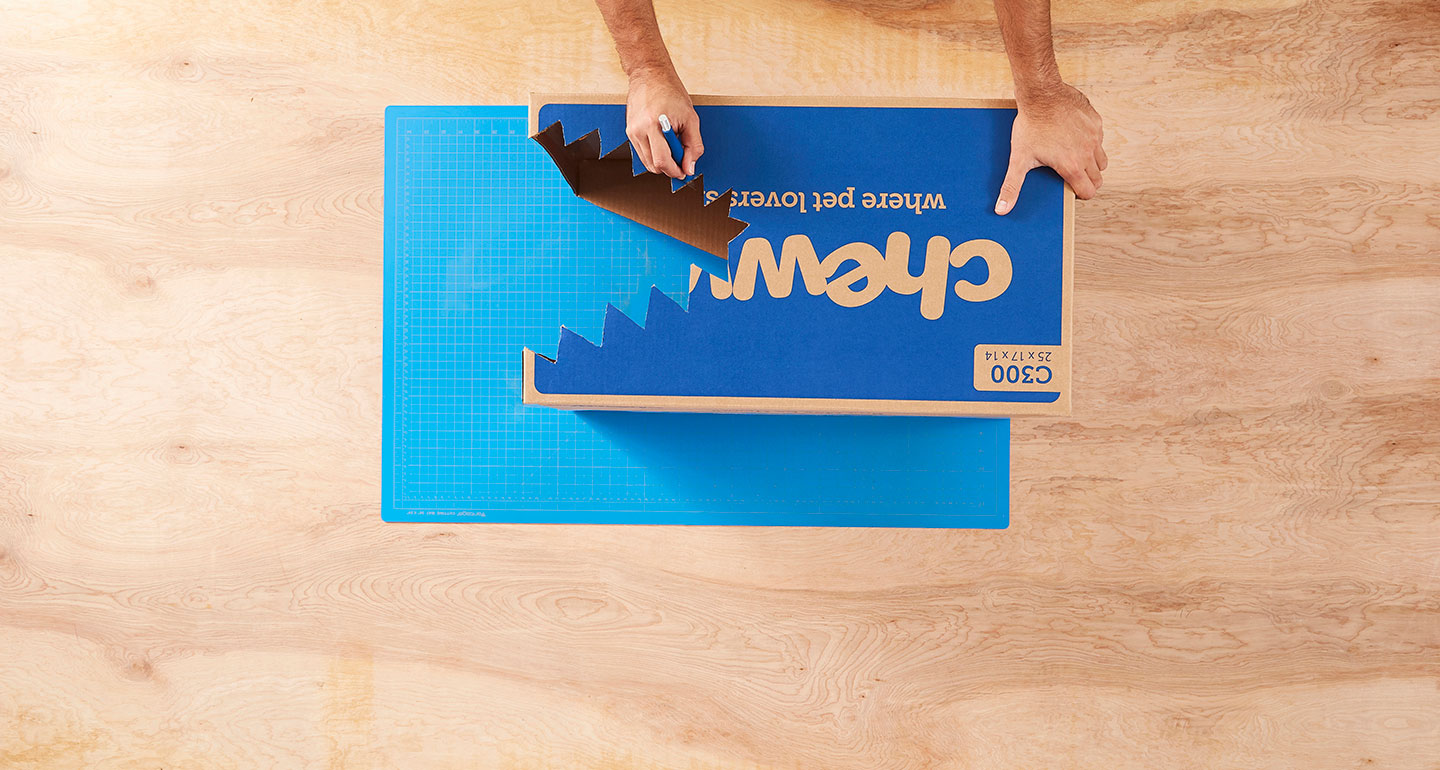
On one long side, cut out a triangular shape for the side opening of the mouth. Repeat on the other long side. Save triangles for later.
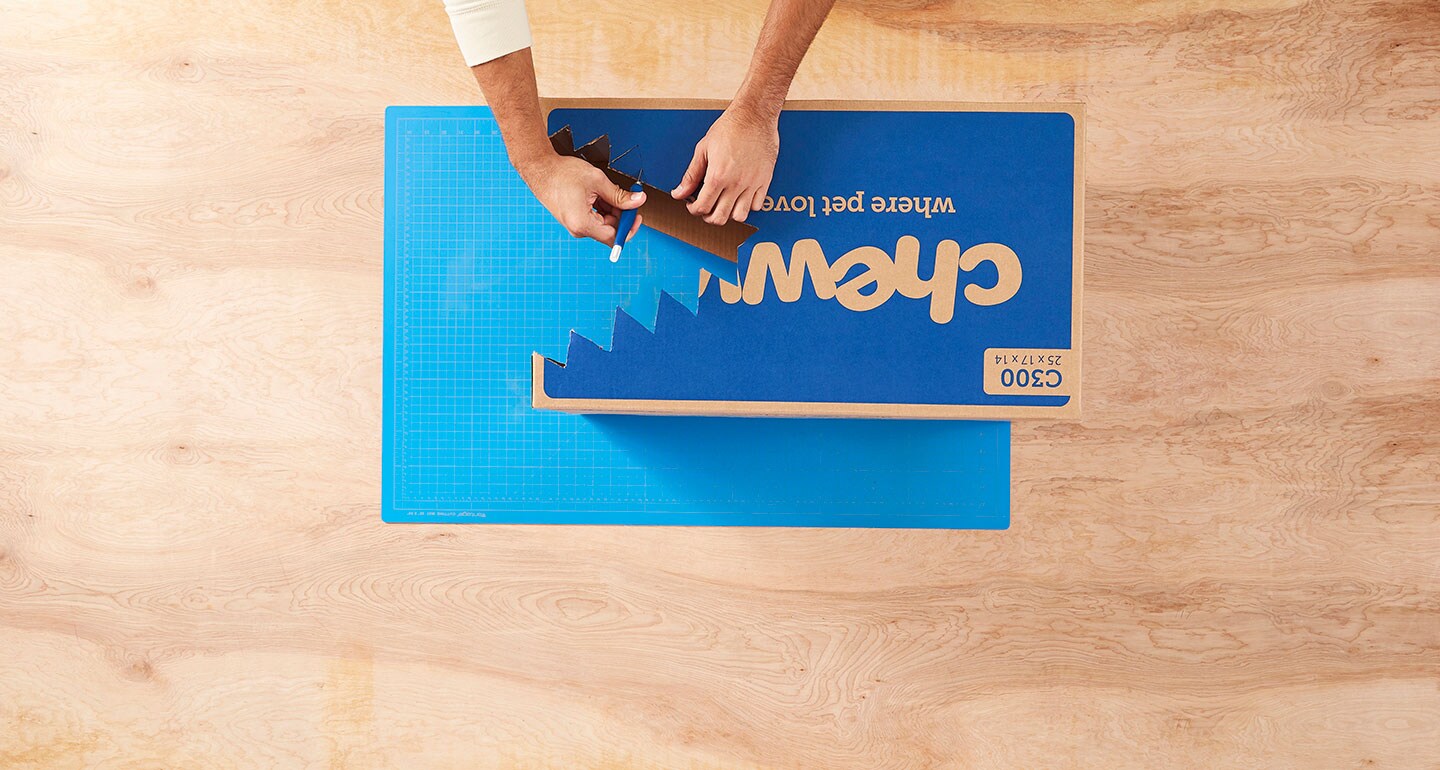
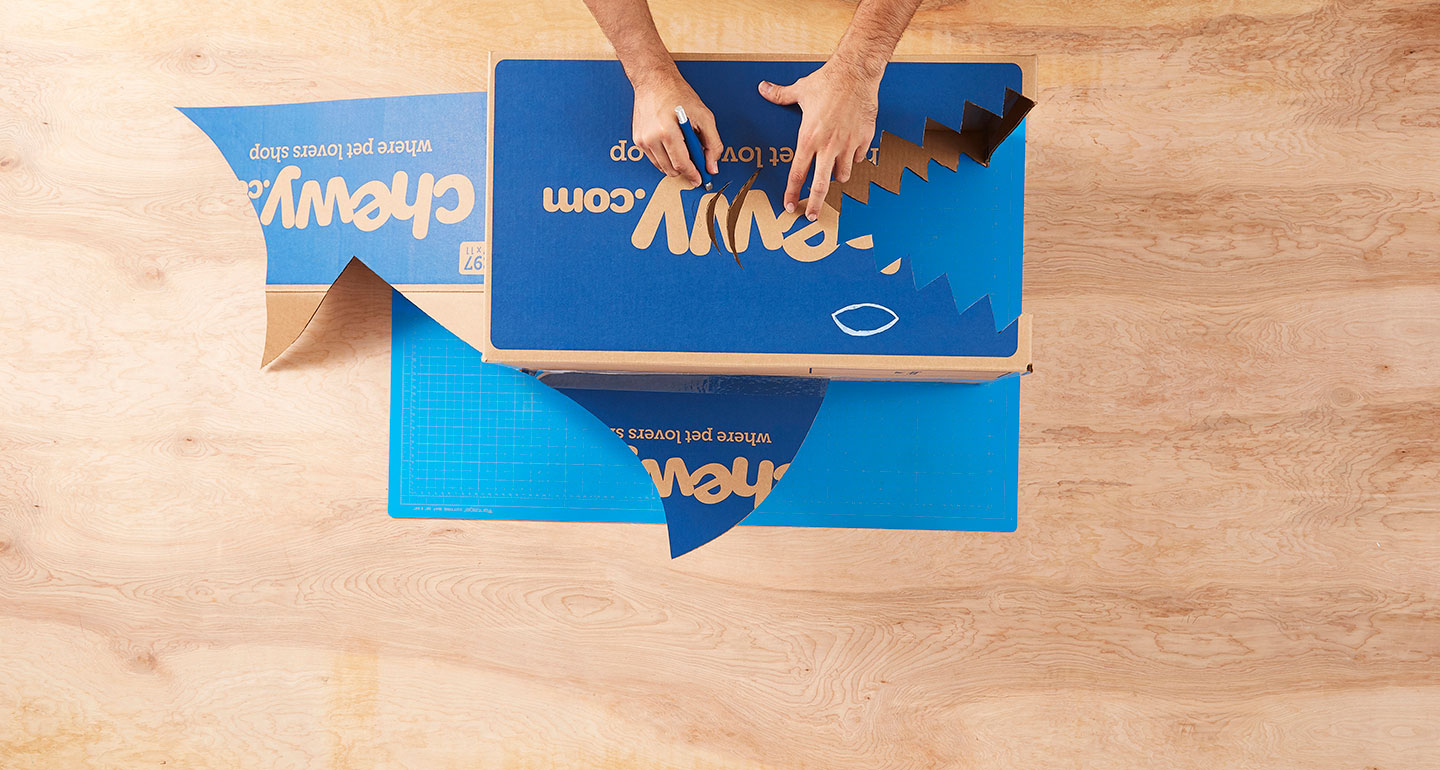
6
Cut a sawtooth pattern along the edges of the mouth opening to form the teeth.
7
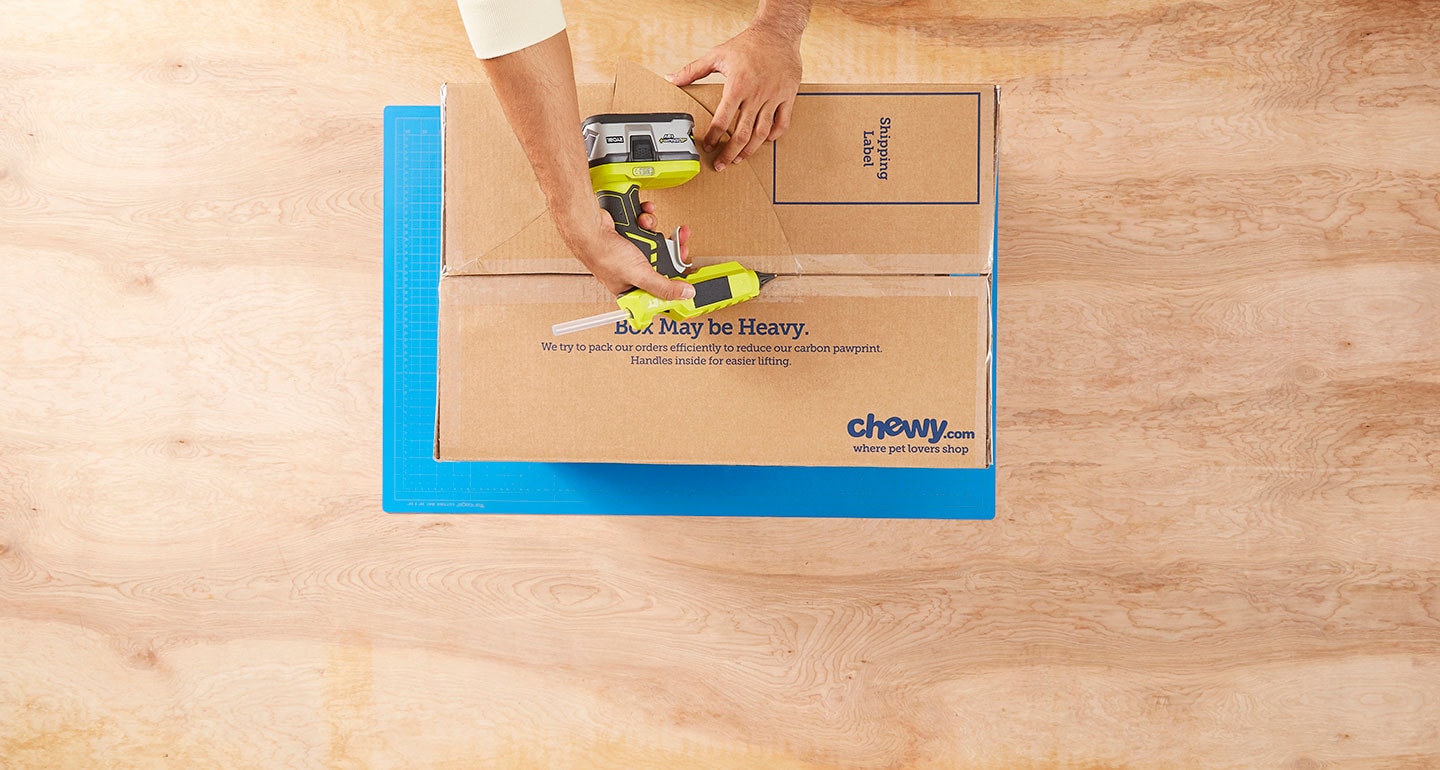
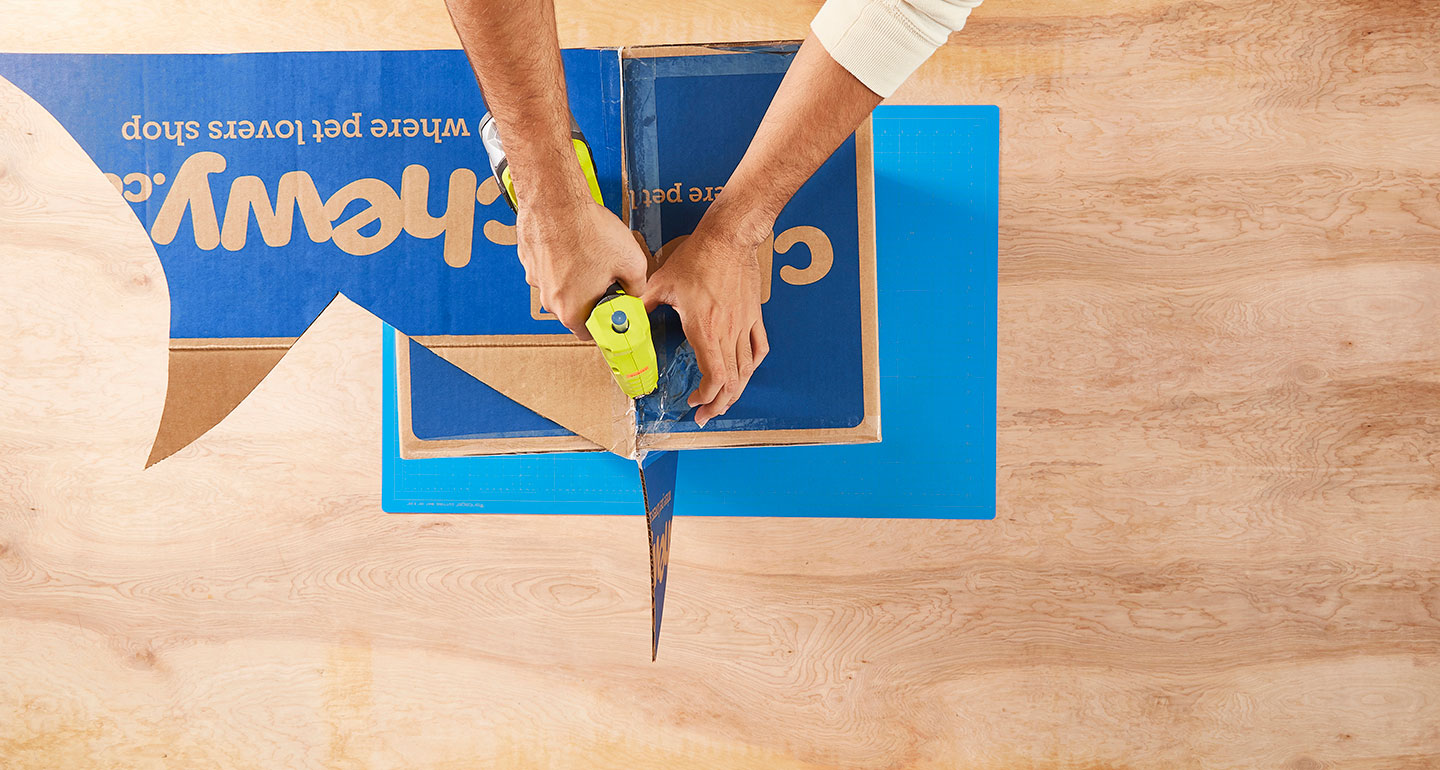
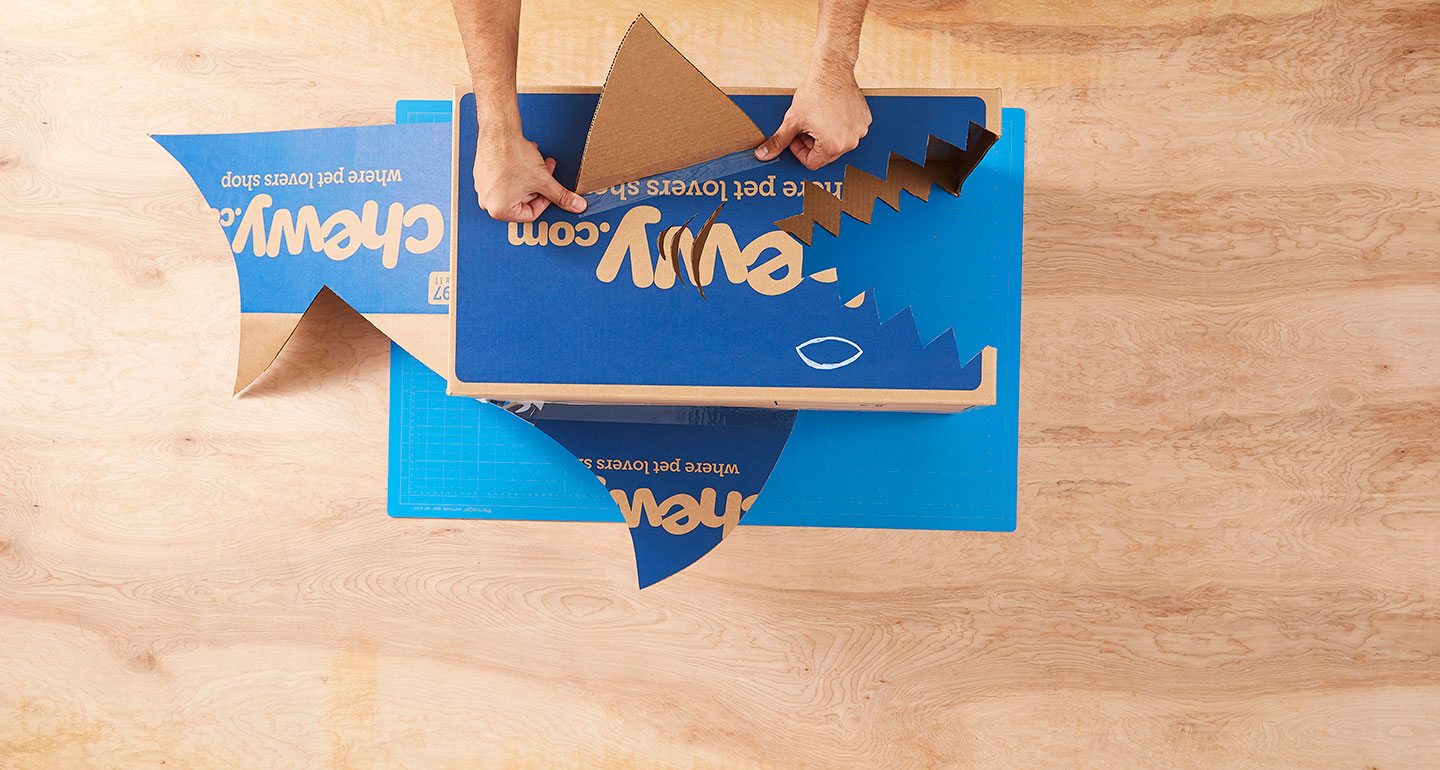
Draw a small top fin shape on one of your discarded flaps and cut it out.
8
Glue it to the top center of your shark with a glue gun. Reinforce with packing tape.
9
Draw a tail fin on the second Chewy box and cut it out.

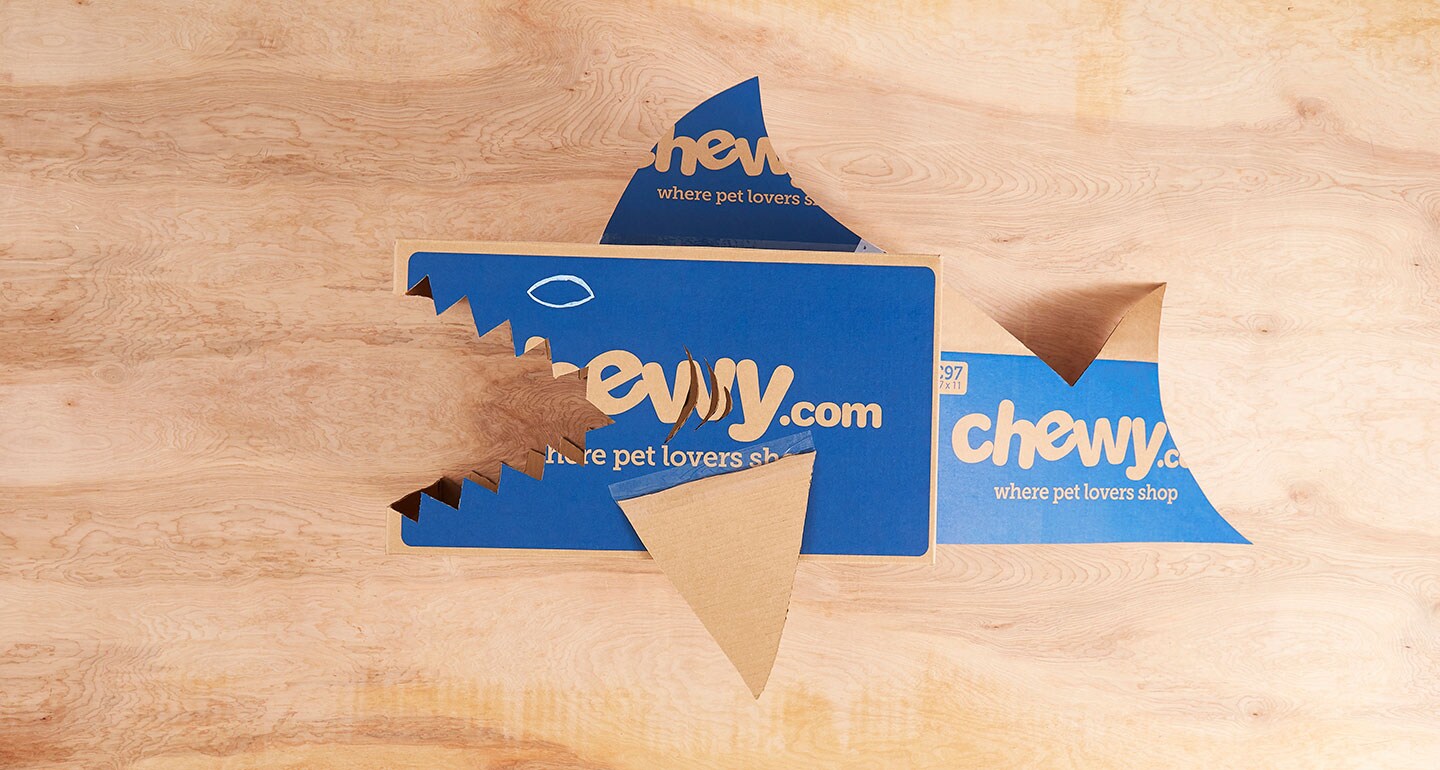
10
Attach tail fin to the back of the shark, in the center, with the glue gun. Reinforce with packing tape.
11
Draw the eyes on either side above the mouth.

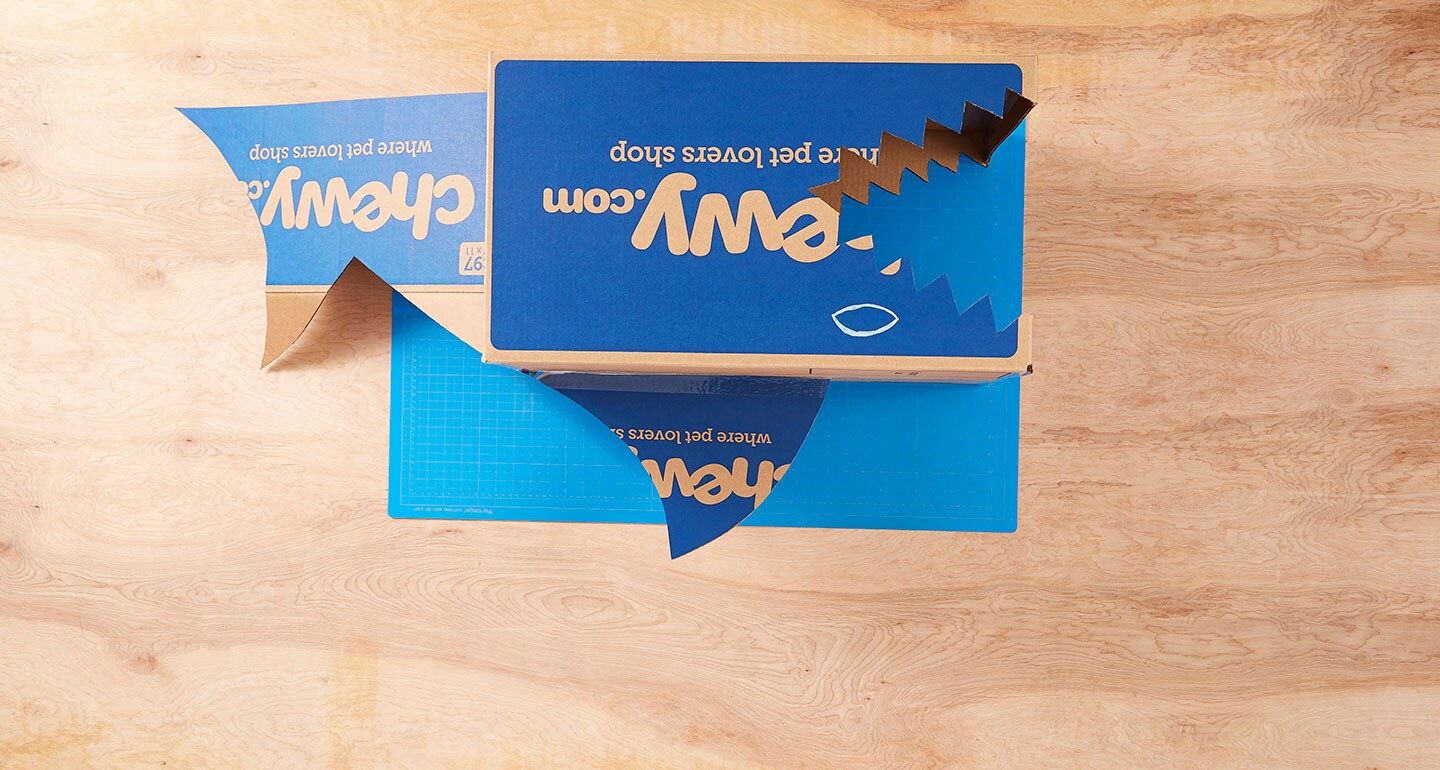
12
Draw and cut out gill openings behind the mouth on each side.
13
Take the triangles you cut out to make the mouth and glue one on either side to make the fins. Reinforce with packing tape.
14
Now the shark-shaped dog house is complete!

Originally from Chicago, Nicole Janiga attended Indiana University’s Kelley School of Business and received her Bachelor of Science in 2018 before making the big move down from the Windy City to the Sunshine State. She frequently enjoys going back to the Midwest to visit friends and family—and to cheer on the Hoosiers! In her free time, Nicole can be found traveling with her Pug @zoetheloaf (currently at 16 states, and counting) or riding her horse around Southwest Ranches.
Share: