Making your own homemade treats is easier than you think. Although it won’t necessarily save you time, it will definitely save you money. Plus, you will know exactly what’s in the dog treats.
Below, get the basic dos and don’ts of homemade treat making, as well as some helpful tips and tricks for a hassle-free baking experience.

Baking Equipment and Tools
First, you will need a few pieces of equipment to make your baking easier. These are some of my favorites:
- Mixing bowls in a variety of sizes.
- A wooden spoon for making sure the mixture is thoroughly combined. If you plan to make larger batches, a food processor will be handy.
- Measuring cups and spoons
- Baking sheets
- Parchment paper (for easy clean up)
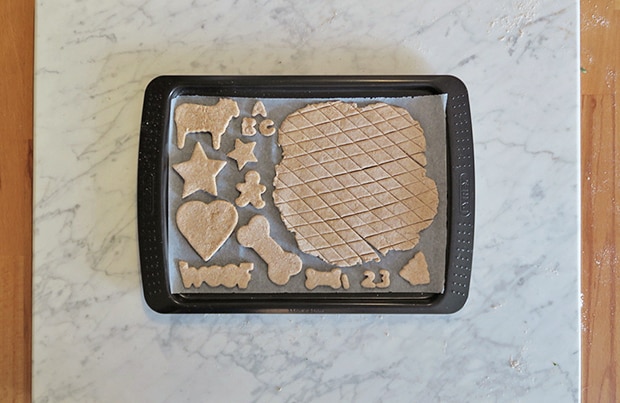
- Assorted cookie cutters—a dog bone is an essential!
- A 6 wheel pastry cutter helps you cut square, rectangular or diamond-shaped treats.
- A rolling pin. Look for a slightly heavy wooden pin and make sure it is wide enough to cover the width of the dough you are rolling out. If you want to make super impressive dog treats, you can roll out the mixture using a dog pattern rolling pin.
- Food safe storage containers for storing leftover ‘human’ ingredients, dog treat dough or finished dog treats.
- Ice cube trays. These are great for summer treats and storing mashed vegetables or stock to add additional tasty ingredients to the treats. Just thaw when needed.
- Online cooking unit converter. Convert U.S, British and European kitchen units for various cooking ingredients.
Start with Easy Recipes
If you’ve never made treats before, I suggest you start with a basic two-ingredient dog treat such as flour and yogurt. Use a flour that is easy to handle (such as wholemeal flour) and combine the two ingredients to make a dough. If the dough is too dry, add more yogurt until you get the correct consistency. If the dough is too wet, add a little more flour. Simple treats like these should be baked for 20 minutes at 350 degrees Fahrenheit.

Adding New Ingredients to Your Treats
Once you have mastered your basic two-ingredient treat, you can experiment with different ‘dry’ and ‘wet’ ingredients to see what flavor your dog enjoys best. Below are a few healthy choices to get you started. You will probably have some of these in your kitchen already:
- Wholemeal flour
- Oat flour or rolled oats
- Chickpea flour
- Rye flour
- Baby food
- Unsweetened apple sauce
- Peanut butter
- Low-sodium broth
- Eggs
- Sweet potato
- Canned pumpkin
- Banana
- Yogurt
- Grated cheddar cheese
- Mashed potato/sweet potato

You should NEVER make dog treats with the following ingredients (which are toxic to dogs):
- Baby food with onion and/or garlic
- Grapes
- Raisins
- Chocolate
- Artificial sweeteners
- Artificial colorings
- Nutmeg
- Macadamia nuts
Alternatives for Dogs with Allergies
If your dog is on a special diet or has allergies, you may need to be careful about which ingredients you use. For example, if your dog is wheat and gluten intolerant, chickpea flour is a great alternative. It is a dense flour and binds well in baking (which is not true of many gluten-free flours), so you won’t end up with crumbly treats when you use it.
If your dog has an intolerance to dairy products, choose ingredients derived from soy, rice, almonds or coconut such as coconut yogurt and oat milk. Egg can be substituted with apple sauce or banana.
Following the Ten Percent Rule
Obesity is one of the fastest growing health problems for dogs, so make sure that your homemade treats don’t exceed ten percent of your dog’s daily calorie intake. You can also cut or break your treats into smaller chunks. Dogs care more about the number of treats they get rather than size of the treat.
How to Store Homemade Treats
Make sure the treats are completely cooled before storing, otherwise they’ll steam up the container, making them soggy and stick together.
Meatless, dry dog biscuits can be stored in an airtight container at room temperature for at least two to three weeks. For moist treats or those containing meat, you will need to store them in the fridge where they will last for seven to ten days.

Baking Tips and Tricks
- When baking, consider doubling the recipe and freezing the extra dough. Store it in an airtight container. When you’ve run out of treats simply thaw the frozen dough in the fridge and use as normal.
- Instead of purchasing flour for treats, try making your own oat flour. Simply place whole oats into a food processor and grind until the oats make a finely ground flour
- If you want your dog treats to be harder, drier and to last longer, leave them in the oven with the door slightly open for a few hours after it has been turned off.
- Don’t throw your food leftovers in the waste bin. Instead, remove any skin, fat, bones, pits, or seeds that could cause choking or are toxic to your dog and save them in ice cube trays or small containers and freeze. Simply defrost when needed and add them to your treat recipe.
- Save the stock from simmered meat and fish dishes and store them in ice cube trays (same as with the food leftovers). This can give your treats a tasty hit of flavor.

Kristina Johansen is a certified canine nutritionist who runs Elmo’s Kitchen and provides guidance on general nutrition and home-prepared diets for dogs.
Share: