Indoor Fish Ponds

By: Chewy EditorialPublished:

Indoor Fish Ponds

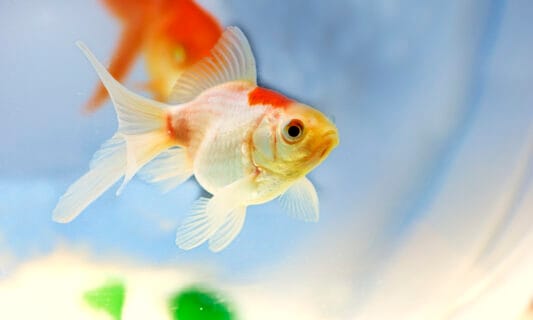
Have you dreamed about having your own 300-gallon community tropical aquarium? Imagine it stocked with a diverse variety of fish swimming among lush plants growing in and above the water. Perhaps a brackish water or tidal pool display has been on your mind. Or maybe your fish fantasy is an indoor pond that shows off your beautiful fancy goldfish as they were meant to be seen — viewed from above. Well, there is a fascinating and affordable way to realize those dreams: the indoor aquatic pond.

The indoor aquatic pond combines the best features of an aquarium and an outdoor garden pond. As its name implies, this pond is indoors. All of the hassles associated with outdoor pond maintenance are eliminated, and it can be enjoyed year round even in the coldest climates. Easily serviced mechanical, chemical and biological filtration systems can be installed to ensure excellent water quality.

Like the typical garden pond, the indoor aquatic pond can hold a lot of water within any shape you desire. For the price of some interior floor space, even apartment dwellers can start keeping pondfish.

Designing and building your own indoor aquatic pond may sound like a complicated and expensive task, but it is not. Nor do you have to be particularly handy. So, if you have considered this type of project before or are tempted to think about it now — but are afraid to launch into it on your own — this article is for you.

I will provide some basic guidelines for planning and building an indoor aquatic pond. Obviously, in the space available here, it is impossible to cover all of the possible variations and alternatives for such a project. These are left to your imagination. The several options I do discuss should be more than enough to get you started.

Planning Considerations

There are a number of considerations to take into account before embarking on this kind of project. These include:

  • The intended purpose of the pond
  • The location for the pond
  • The size of the pond
  • Construction materials
  • Filtration
  • Purpose

The location, size, construction and filtration requirements of an indoor aquatic pond depend, in part, on how you intend to use it. For example, will it be used merely as a holding tank to over-winter outdoor tropical or pond fish in some out-of-the-way location (basement or garage)? Raising tropical fish in a pond during the summer months is increasing in popularity, but few of us live in climates that allow the fish to remain outdoors during the winter. Thus, a large indoor aquatic pond (holding tank) where the fish can be housed during the winter becomes a necessary component of such an endeavor.

Used for this purpose, an indoor aquatic pond consisting of a plywood-covered frame — built with 2x4s — containing a folded PVC pond liner can be assembled very cheaply (1000 gallons for well under $100). The filtration system for this setup can be very effective but equally simple — consisting of garbage pails, garden hoses, lava rock media and so on. Aeration can be provided by some large air pumps and airstones. The water temperature can be maintained with several submersible heating units (aided by warm indoor temperatures).

Perhaps you want a pond that is somewhat fancier, such as a year-round display pond to show off your fish in some prominent area of your indoor living space. I have seen lovely indoor goldfish ponds in living rooms and dens. Some are quite small, only 60 gallons or so, but the aesthetic impact is very different from that of a 55-gallon glass aquarium.

Aesthetically pleasing display ponds — perhaps with glazed tile covering the exterior — will certainly cost more than a basic holding tank. And the filtration system requires some forethought because hiding it is an important aesthetic consideration. Garbage cans filled with bioballs standing next to a marble-tiled pond will be far from pleasing. Therefore, hiding the filter should be an integral part of the display pond design. The additional cost is well worth it in terms of the final result.

Location

Choosing the location for an indoor aquatic pond calls for a bit more thought than placing an aquarium. Remember, you are probably not going to move this feature for a number of years. Like a wall or door, it will be one of those fixtures that you end up arranging furniture around.

In this respect, aesthetics do matter. Because you will be designing and building the pond from scratch, you can be creative about fitting it into a corner space, along an unused wall area or other location. Often, any space that has been enhanced by large house plants will be a good location for the pond. (To help visualize the scene, I suggest you simulate the pond by placing large cardboard boxes in the space you are considering for the final location.)

Besides aesthetics, there are a few practical considerations in deciding where to locate the pond. Maintenance is a very important factor. Remember, your indoor aquatic pond will hold a significant quantity of water, some of which will have to be changed regularly. This means removing water and adding water. Irrespective of whether you use buckets, siphon hoses or pumps, water will spill and fish will splash. Aquatic ponds and silk drapes do not mix.

Household traffic patterns are important to think about. Because of their placement on the floor, as well as their size, indoor aquatic ponds are much more “intrusive” than standard aquariums. You do not want to place the pond where it might interfere with normal traffic patterns inside the house or apartment, or pose a safety hazard. This means not placing low-sided ponds next to a doorway or entrance way. You want people to see the pond, not swim in it. (Of course, you can purposely locate the pond to alter traffic patterns, but this should not be an afterthought. If traffic control is part of your purpose for this project, then design the pond with this in mind.)

Don’t place the pond under windows you plan to open or clean with any regularity. Similarly, think about access to shelves, lamps, electric outlets, light switches and other things. Again, using cardboard boxes to simulate the pond can save lots of frustration later.

You should place your indoor aquatic pond well away from significant electrical equipment. A pond is not the kind of thing to casually install next to the television or music system.

Then there is the problem of small children and animals. A foot of water located on the floor is more than enough to drown in. How will you keep the small and curious out of the water?

Last, but not least, there is the question of floor strength. Most building codes specify what load a standard floor should be able to bear. However, these codes vary considerably across the country. As will be explained below, if you keep the pond depth to no more than 18 inches, you will have no problems with standard construction. Reinforced concrete floors and basement floors would not have this restriction and the pond could be deeper.

Size

Using the construction approach described below, you can make your indoor aquatic pond any size and shape you like. For those not intimately acquainted with hammers, saws and the like, rectangular-shaped ponds are the easiest to build. They also lend a formal appearance.

Free-form shapes offer a more naturalistic impression. Just keep in mind that whatever shape and size pond you ultimately choose, you must be able to reach all areas of the pond for maintenance.

Regardless of the shape, the length and width of the pond are dependent on how much interior floor space you are prepared to surrender. Generally, length and width are determined in one of two ways. On the one hand, if you have a particular location in mind, you design the pond to fit that space. On the other hand, if you have a particular volume (capacity) in mind, then length and width are often predetermined, and the task becomes one of finding a reasonable location to put the pond. The minimum length and width for a given capacity are controlled by the depth of the pond, which should not exceed 18 inches with most floors.

In fact, choosing the depth requires a bit of thought. (Depth, in this context, refers to the water depth. The pond wall height will have to extend a few inches above the water surface.) From a fishkeeping perspective, a 12-inch depth is nice for tidal ponds, fancy goldfish ponds or tropical ponds that feature shallow water fish. This is the depth of a 20-gallon “long” tank.

Imagine a tide pond display that is square: 6 feet long, 6 feet wide and 1 foot deep. This pond would hold 270 gallons — a nice marine setup! With a wide shelf running all the way around, you could sit on the edge and watch starfish inch along the sand and crabs crawl up onto the rocks.

A 24-inch depth (which is what you would find in a 30-gallon “tall” tank or a standard 125-gallon tank) might be necessary for a large reef display or an indoor koi pond, but only on floors capable of bearing this load. My indoor koi ponds are about 22 inches deep. Some years, the koi have actually spawned in the one in the basement!

It is the water’s depth (or, as it is technically known, the water column height) that affects the load on the floor. This load is measured in terms of pounds of weight per square foot of floor space. Each foot of water (measured as depth) places a load on the floor of 62.4 pounds per square foot, or about 6.9 ounces per square inch. Thus, a floor that could easily hold a pond 10 feet long by 10 feet wide by 6 inches deep, with a load of 31.2 pounds per square foot, might have serious support problems if the pond were 1 foot long by 1 foot wide by 50 feet tall, yielding a load of 3120 pounds per square foot — even though both tanks contain 3120 pounds of water.

In general, if you keep the depth to 18 inches or less — that of a standard 55-gallon tank — you should not have a problem on any standard floor in this country. However, it is worth checking with the local building department before going ahead with the project.

Because the planned water depth also determines the height of the pond walls, the total depth of the pond structure is affected by aesthetic considerations. A 3-foot-high, wood-panelled display pond might look elegant in a den with a cathedral ceiling, but its contribution to a formal living room with a low, flat ceiling might be quite different. The pond will be part of the living space. Think of it in those terms.

Construction of Simple Holding Tanks

Because a simple holding pond is the basis for fancier display ponds, let’s consider the holding pond first. The basic holding pond consists of a rectangular frame constructed with 2x4s. The inner side of each of the four frame walls is covered with ½-inch plywood. A PVC liner is then fitted inside to hold the water. The framing work is very simple and anyone who can hold a hand saw and a hammer can build it.

Step 1:

Determine the outer dimensions of the holding pond. You can choose the dimensions based on the location or based on volume requirements.

The table to the right relates the pond’s outer floor area, water depth (which is always less than the actual tank wall height) and water volume. It shows what the capacity in gallons is for a given area at different water depths. You can be more precise by taking the area of the pond, multiplying it times the depth, multiplying that number by 1728 (the cubic inches in a cubic foot), and then dividing by 231 (the cubic inches per gallon).

Step 2:

Calculate the load on the floor by multiply the expected water depth in feet times 62.4. The result is pounds per square foot. (You may recall that each foot of water depth places a load of 62.4 pounds per square foot.) To calculate the total weight placed on the floor, multiply the load times the pond’s floor area.

As noted earlier, check the local building codes to make sure your floor can handle the load and weight. You will certainly be on the safe side if you limit the depth to no more than 18 inches of water, which imposes the same load as a standard 55-gallon tank. A concrete basement or garage floor, of course, can handle any load.

Step 3:

Once you are sure the pond can be placed safely on the floor, it is time to build the frame. Each of the four walls — the front, the back and the two sides — will be constructed individually and then bolted together to form the frame. Each wall is a skeleton made from 2×4 lumber (see Figure 1). The top and bottom plates for the front and back walls should be cut to the full outer length of the tank. These will be connected by 2×4 ribs spaced 16 inches apart. The number of connecting ribs rarely works out to a whole number, so add an extra rib and shorten the distance between all of them.

The length of the connecting ribs is determined by the total wall height minus the thickness of the top and bottom plates. The wall height should be about 6 inches greater than the planned water depth. For example, if the water depth is to be 18 inches, the wall height would be 24 inches. Now subtract 3 inches from the wall height to compensate for the thickness of the top and bottom plates. The result is 21 inches, and this is the required length for the ribs.

As shown in Figure 1, the ends of each wall skeleton are double 2×4 ribs. Use 10 penny (10d) galvanized nails to construct the walls by driving two nails through the top plate into the end of each rib. Then, flip the assembly over and do the same through the bottom plate.

The top and bottom plates for the side walls should each be 7 inches shorter than the planned outside width. This is to compensate for the thickness of the front and back walls. Thus, if the planned outside width is 4 feet, then the top and bottom plates for the side wall construction should be 3 feet, 5 inches long. Complete the construction of the side walls as described in the previous paragraph.

Step 4:

With the walls finished, bolt them together. I prefer bolting, rather than nailing, because you may want to take the framing apart some day. Assemble by placing the two side walls inside the front and back walls. Bracing the ends together (you may need to tack a board across the joints to hold them in place), drill three 7/16-inch-diameter holes through the end ribs of the front (and back) wall and then through the end ribs of the side walls (see Figure 2). The frame is held together with 7-inch-long, 3/8-inch-diameter bolts. Place a large washer on the bolt, slide it into the hole, place a washer on the emerging end and fasten the nut tightly.

Step 5:

Using sheets of ½-inch C/D exterior plywood, cut panels to fit the inside wall dimensions of the tank. Nail these panels in place using underlayment nails. Unlike regular nails, these special nails (available at any hardware store) are much less likely to pull out under a load.

Step 6:

Line the floor inside the tank with 1-inch polystyrene insulation board. Then place another 1-inch layer of insulation board inside the tank, leaving a 1-foot by 1-foot cutout in one corner. This will act as a sump and will greatly facilitate cleaning and draining in the future.

Step 7:

I saved the liner for last because experience has shown that many people find it difficult to measure correctly, and once you order a liner you are stuck with it. With the frame constructed, measure the inside dimensions of the tank. Reef Industries (http://www.reefindustries.com) will fabricate a custom liner to fit your tank at a bargain price. Custom liners fit like a glove. All they need are the dimensions of the tank.

Of course, if your folding skills are adequate, you can use a standard flat sheet liner manufactured specifically for pond use, such as those sold by Tetra Pond (http://www.tetra-fish.com). To determine the size of the liner, simply multiply the wall height by 2 and add the result to both the pond length and width. Then add another foot to both dimensions. This is the size liner you need. For instance, if your pond is 6 feet long, 3 feet wide and 2 feet in height, you should order a liner that is 11 feet long (2 x 2 plus 6 plus 1) by 8 feet wide (2 x 2 plus 3 plus 1).

As I noted above, the liner will have to be folded into place. Do not nail or staple the top edge of the liner until you have filled the pond with water. The liner needs to have slack to adjust. Once the water is in, you can fasten down the top edge.

Your holding pond is done. And I can tell you it works — I have been over-wintering my koi in 1000 gallons of water in my basement for many years.

Construction of Display Ponds

From a design and construction standpoint, display ponds are basically holding ponds where aesthetic considerations are paramount. In particular, the outer sides of the tank walls and the top ledges are attractively finished, usually in wood, tile or brick. Let me suggest three interesting alternative designs.

Display Pond Option 1

This is a basic frame and liner unit with the exterior top and sides finished. For example, I have a 300-gallon goldfish pond in the sunroom at the back of my house. As originally built, the sunroom walls and ceiling were covered with tongue-in-groove pine. So, when the pond was constructed, its exterior was finished with the same wood, giving a built-in appearance.

A wide wooden ledge for house plants finishes the tops of the pond walls. The back ledge of the pond supports the biological filter, the outside of which is constructed of the same tongue-in-groove pine. House plants with long, trailing vegetation sit on top of the filter box. The combination of plants and matching wood completely disguise the filter box’s true function.

When decor demands it, display ponds may be designed in more complicated shapes than the simple rectangle of the holding pond. Here again, the indoor goldfish pond noted above is a good illustration. The pond was fit into one of the corners of the sunroom. If it had a rectangular shape, one of its corners would jut out into the middle of the room. Not only would this be unsightly, but it would also be a hazard to room traffic. In designing the pond, one corner was cut off, making the pond five-sided. Fitting the liner required a little fancy folding, but that was all.

If you are looking for something truly original (and also more expensive), you might consider a prefabricated display pond. Many water garden centers offer exotically shaped fiberglass ponds in a variety of sizes.

These prefabricated ponds were not designed to stand alone above ground, so you will have to build a supporting structure. But this is where your creativity can really shine. Let me suggest two possibilities.

Display Pond Option 2

Select the prefabricated pond you want to install. Then, build a skeleton frame as already described, but do not attach plywood to the inside walls. Leave the frame open. The frame can be any shape you want, but there should be at least 8 inches of space between the frame and the pond on all sides. The height of the frame should be no less than the depth of the pond plus 1 inch.

You can use ¾-inch exterior-grade plywood to create a top to fit over your frame. To do this, set the prefabricated pond upside down on top of the plywood exactly where you want it to sit in the frame. Trace the pond outline onto the plywood. The pond lip will actually rest on this plywood top, so measure the distance from the outer lip of the pond to the pond wall. This will probably be about ¾ of an inch. Retrace the pond shape along the inside of the first trace so that the second tracing is separated from the first by the distance from the pond’s outer lip to the pond wall. Cut this area out of the sheet of plywood.

Fasten the plywood top to the frame with brass wood screws. Next, set the pond in the cutout. The pond’s bottom will be off the floor by about 1½ inches. The prefab pond should be supported from below, not by the lip resting on the plywood deck. Therefore, using scrap 2×4 pieces and plywood, assemble a platform to support the pond from underneath.

Next, position cinder blocks around the inside of the frame so that they just touch the pond walls. There is no need to cement anything in place. This is all the side support that the fiberglass prefab unit requires. If you leave enough room between the frame and the pond unit on one side, you can also install all the necessary filtration underneath as well — completely out of sight.

Now, close up the frame with an outside finishing material. Some people use wood panelling, others use false brick or tile. No matter what you do, I would make sure that at least one of the outside panels was removable just for access. Naturally, this access would be absolutely necessary if the filter system was located underneath.

Display Pond Option 3

This is a tad more innovative than option 2 and should appeal to naturalists. In this example, the frame will hold soil for planting and the prefab pond will be sunk into the soil (see Figure 3).

Design the frame so that it will enclose the prefab pond, but leave enough room for planting areas. The frame area might be 50 percent larger than the pond area. The prefab pond can also be placed off center within the frame so that one large planting area is created. (You can, of course, use a liner here instead of a prefab pond. Just follow the instructions above for the pond liner installation.)

Assemble the frame, but this time add the interior plywood walls as discussed in the section on holding ponds. Lay down an inch or two of insulation board for the interior floor. Now install a liner to fill the inside — again, just like for the holding pond. This time, however, the liner is going to hold soil, not water. You have just built a giant planter box.

Fill the box about half way with good soil. Hollow out the area for the pond and set it in place. Now continue to fill with soil. Plant and landscape according to the amount of light available where the pond is.

Filtration For Indoor Aquatic Ponds

Filtration for indoor aquatic ponds can be as simple or as intricate as you like. What I definitely suggest you not consider is a standard aquarium-style undergravel filter. This is a maintenance nightmare. Instead, let me suggest a few alternatives.

The easiest system combines mechanical and biological filtration right in the pond. The filter is a hollow cylinder wrapped in a foam sleeve. Danner Manufacturing (160 Oval Dr., Central Islip, NY 11722) offers very nice units. For very large ponds, several of these units can be connected together.

A submersible pump draws pond water through the foam-covered cylinder. The pump should have the capacity to turn over the pond volume at least once an hour. Output from the pump should be directed to the surface or to a fountain or mini-waterfall. If additional aeration is needed, it can be provided by an air pump and airstones.

Those who object to having the unsightly pump and filter in view will have to go to a bit more trouble. Mechanical and chemical filtration can be provided by a large canister filter. The output from the canister can feed the outside biological filter, which then empties back into the pond.

The nice thing about all the indoor aquatic pond designs discussed here is that they are easy to plumb. Through-liner and bulkhead fittings are available from ¾-inch to 2 inches in diameter that allow piping and hoses to be attached underwater — no siphon tubes needed. A standpipe drain can be installed in a few minutes. Thus, the canister filter will run at maximum efficiency because there will be no long hoses or any need to pump water upwards (both of which reduce the pump’s ability to move water).

The outside biological filter can be homemade or you can purchase a commercial unit. The most important thing is to match the filter to the pond size. Generally speaking, the filter should have about 7 percent of the water volume of the pond. For example, if the pond holds 300 gallons, the filter should consist of about 21 gallons of biological media. I strongly suggest using plastic media. Second best is lava rock. You do not want to get involved with cleaning sand or gravel filters indoors.

The question is, where to hide the external filter unit? Basically, the filter can either be hidden inside the frame or behind the pond, or it can be designed to match the display pond in exterior appearance.

Let’s consider hiding the filtration system inside the frame. If your display pond follows the option 1 design, you will need to build a partition wall into the frame structure. This creates a dead space to store the equipment.

If your display pond design is option 2, hiding the filter inside the frame is no problem. All you need do is add some extra space in the frame.

Finally, if you decide that option 3 is to your liking, you will need to design a dead space as described for option 1. In this case, the plumbing has to be set in the frame before the soil is added.

The alternative is to keep the filter system out in open sight, but make its appearance more presentable. This means building a filter housing that matches the exterior of the display tank or some other feature in the room. The filter for my goldfish pond rests atop the pond and is designed to match the tongue-in-groove exterior of the pond.

There are dozens of other possibilities. All that is required is a little forethought and imagination. Take your time on this project and you will be rewarded many times over.

Other Considerations

Obviously there are many other things that could be said about indoor aquatic ponds. Let me just mention a few final points. Despite the large surface area of an indoor aquatic pond, you should think about supplementary aeration. The easiest thing to do is connect an air pump to one of those giant airstones available for large tanks and outdoor ponds. Some people route the output from the filter over a waterfall. Venturi jets also work well. Whatever your approach, aeration is an important aspect of maintaining good water quality.

If your pond requires tropical temperatures, submersible heaters are going to be necessary. The rule of thumb for heating aquariums is to use between 2 and 10 watts of heating power per gallon of water, with 5 watts being a good compromise. Whether you go for the low end or the high end depends on the ambient room temperature and the overall climate where you live. In any case, you will find that temperature distribution is more even if you use several heaters rather than one large one. Just make sure that the heaters you buy are of good quality. Don’t try to save money here.

An ultraviolet sterilizer is an accessory worth considering. It does a great job of controlling algae. It also reduces the concentration of disease-causing organisms in the water.

Last, but not least, water and electricity do not mix well. This means that your indoor aquatic pond should have its own special electrical outlet. In particular, the outlet should be a ground fault unit. Don’t economize here — install one. You can do it yourself by following the instructions that come with the unit.

Fishkeeping is one of those hobbies that offers infinite variations. Indoor aquatic ponds are just one other way to enjoy the hobby no matter what kind of fish you keep.


Posted By: Chewy Editorial

Featured Image: Via Kasia/Flickr

Share:

By: Chewy EditorialPublished:

BeHome